Stille - Design Process
To see rest of the project:
Research
I started with desktop research to understand the aging and motivation: the books I referred to included Aronson’s Elderhood, Gawande’s Being Mortal, as well as Dan Ariely’s Payoff: The Hidden Logic that Shapes our Motivations. Concurrently, I started volunteering at the nursing home where I eventually did my research, and was able to ask some of the staff on possible areas of research for my final project.
This generated a few areas in aging and eldercare, including:
- How might we help elders to maintain their daily routines?
- How could we help elders be calmer, and less agitated or sad?
- How could we preserve the “life space” of elders with mobility issues?
Eventually, I zoomed in on the brief by putting all these areas onto sorting cards, and asking a nursing home manager to prioritize. (See Brief section above).
After the brief was prioritised, the research process proceeded in two phases.
Phase 1 involved shadowing the caregivers of a single floor in the nursing home. I shadowed the caregivers for three shifts (total 21 hours): two day- and one evening-shifts. There were some co-creation sessions, involving sacrificial prototypes. The shifts were documented in the research video below, which shows a typical day in the life of a caregiver:
A Day in the Life of a Nursing Home Floor (Stille Research video, public) from CIID IDP on Vimeo.
Phase 2 involved a series of co-creation sessions with the caregivers (10 in total). The first co-creation sessions were initially used to refine concept ideas from Phase 1, with increased fidelity. This was a mistake, as the fidelity of the prototypes ramped up too quickly, and the feedback was polite but not candid. An advisor pointed out that I was still unclear what I should prioritize, and what should be physical vs. digital. It was also unclear how and where my solution would fit within the existing service ecosystem of the nursing home.
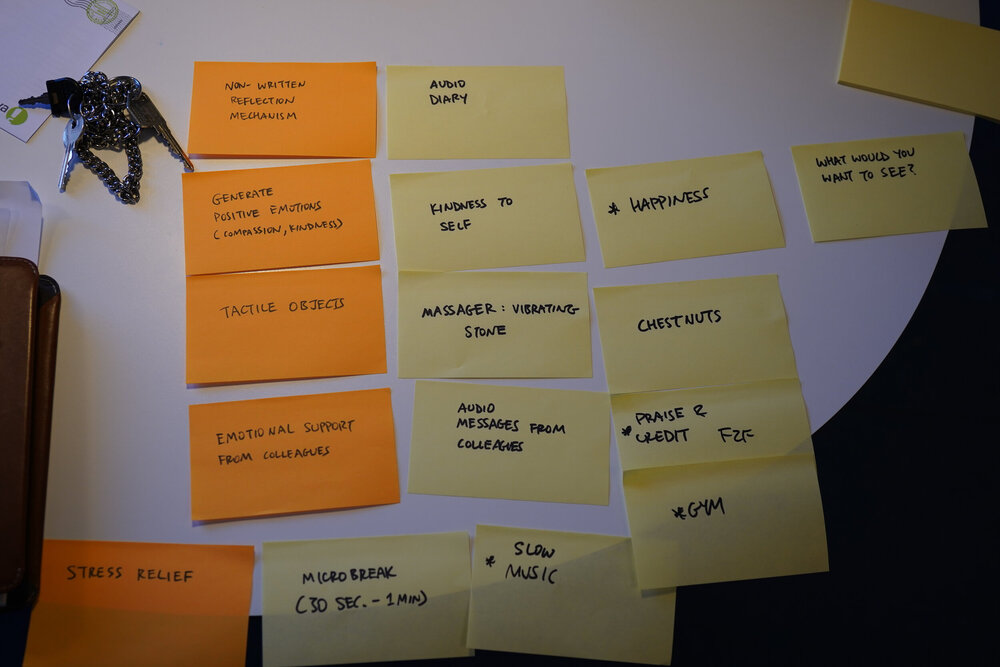
Thus I deliberately went back to the caregivers with sorting cards and a few blank Post Its, to get the data of what the caregivers would prioritize (this was “emotional support from co-workers” and “individual reflection time” respectively, which became the first two modules of my solution). Subsequent sessions involved deliberate testing of specific hypotheses using prototypes (see below), together with open-ended co-creation of possible solutions.
Prototyping & Iteration
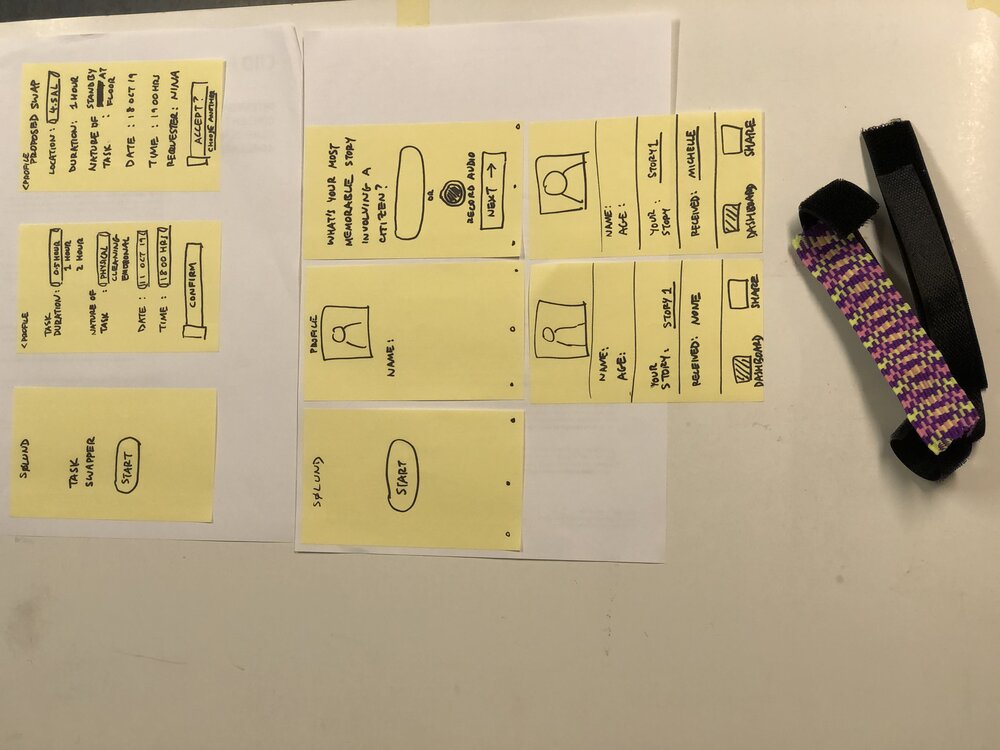 Sacrificial Prototypes: Task Swapper, Story Sharer, and the Mood Bracelet
Sacrificial Prototypes
Sacrificial prototypes were used to catalyze conversations with the caregivers during Phase 1, and to generate ideas on possible solutions with them. The concepts for these prototypes came from a group brainstorming with the whole IDP 2019 class, and are pictured below:
The Task Swapper was a concept to create a break (Design Principle 1) by swapping tasks between floors in the nursing home, using an app to facilitate the swapping of tasks with colleagues on other floors. This was quickly rejected, as the residents will only allow care from caregivers they are familiar with, making caregivers not swappable.
The Story Sharer was a concept of an app that allowed the sharing of stories between caregivers, about their memorable interactions or experiences with certain residents. This was designed to strengthen the bonds between co-workers (Design Principle 3). This ran into the privacy constraints (there were guidelines against naming or identifying caregivers); it was a trainee nurse who suggested sharing stories and appreciation for co-workers instead. This became the nucleus of the Co-Worker Module.
The Mood Bracelet was a concept to allow co-workers to more clearly signal their moods to each other, allowing for reinforced social bonds and also focusing on the emotional (Design Principles 2 & 3). A trainee nurse pointed out that this could be achieved by simply asking each other “how are you feeling” during their staff meetings: hard to beat that!
Hypotheses testing to find the balance between physical vs. digital The initial research and sacrificial prototypes yielded initial validatio, but the feedback was polite and not candid.
Consequently, I went back to using sorting cards. I also created a storyboard to test the different modules (co-worker care, self-care) using both digital and physical devices, and also used lo-fi screens (i.e. Post Its) and hi-fi screens to test and find out what needed to be physical vs. digital. Sorting Cards
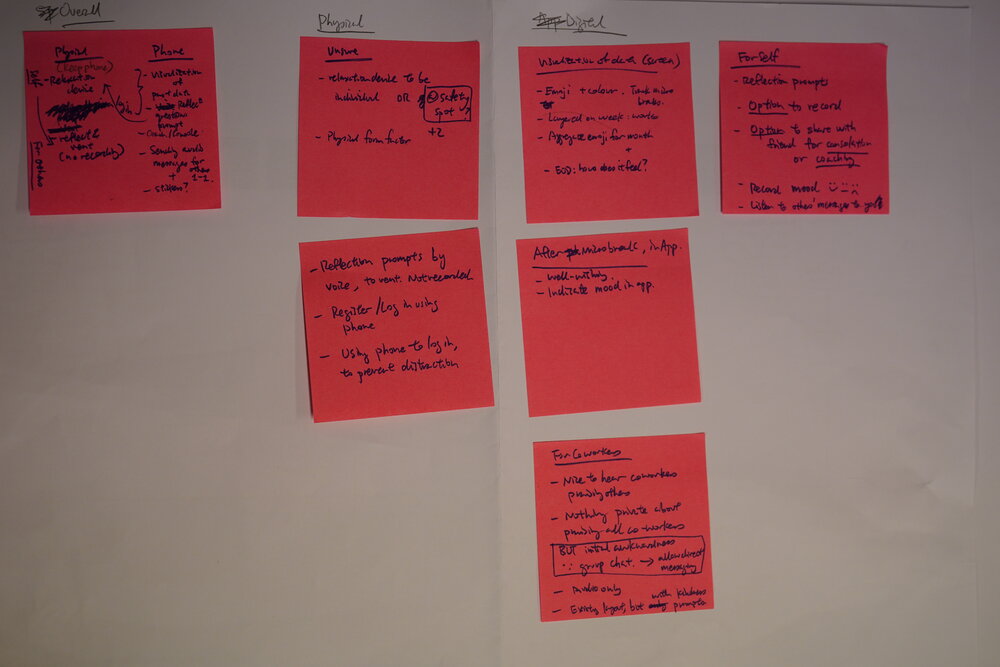
After Phase 1 ended, I went back to sorting cards to get a sense of what needs the caregivers prioritized Physical device test flow
 Storyboard for testing the physical device for co-worker and self-care modules, which I then tested in the nursing home
 Self Care Post-It “screens”
 Lo-Fi Post-It “screens”, which were used to test the “app”, concurrent to the physical device test. Both were used to figure out what part of the solution should be digital vs. physical.
 C
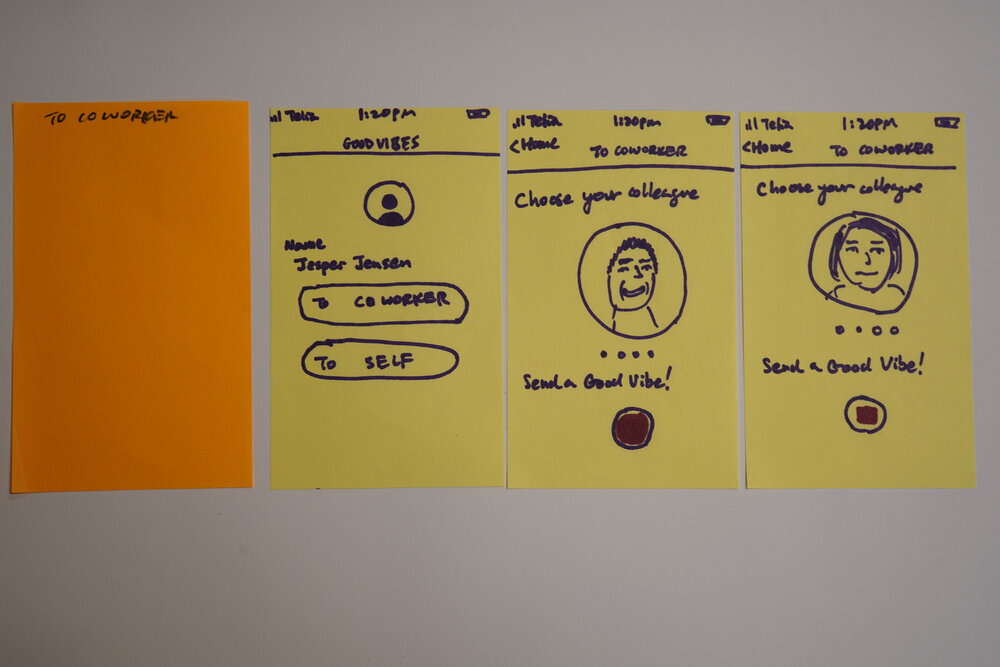 Caregiver F. was asked to perform both the physical device and digital Post-It “app” screen test flows. This helped me figure out which part of the solution should be digital, and which part should be physical.
 Worksheet on finding physical-digital balance
 This sheet shows the work-in-progress as I tried to determine which parts of the solution should be digital vs. physical.
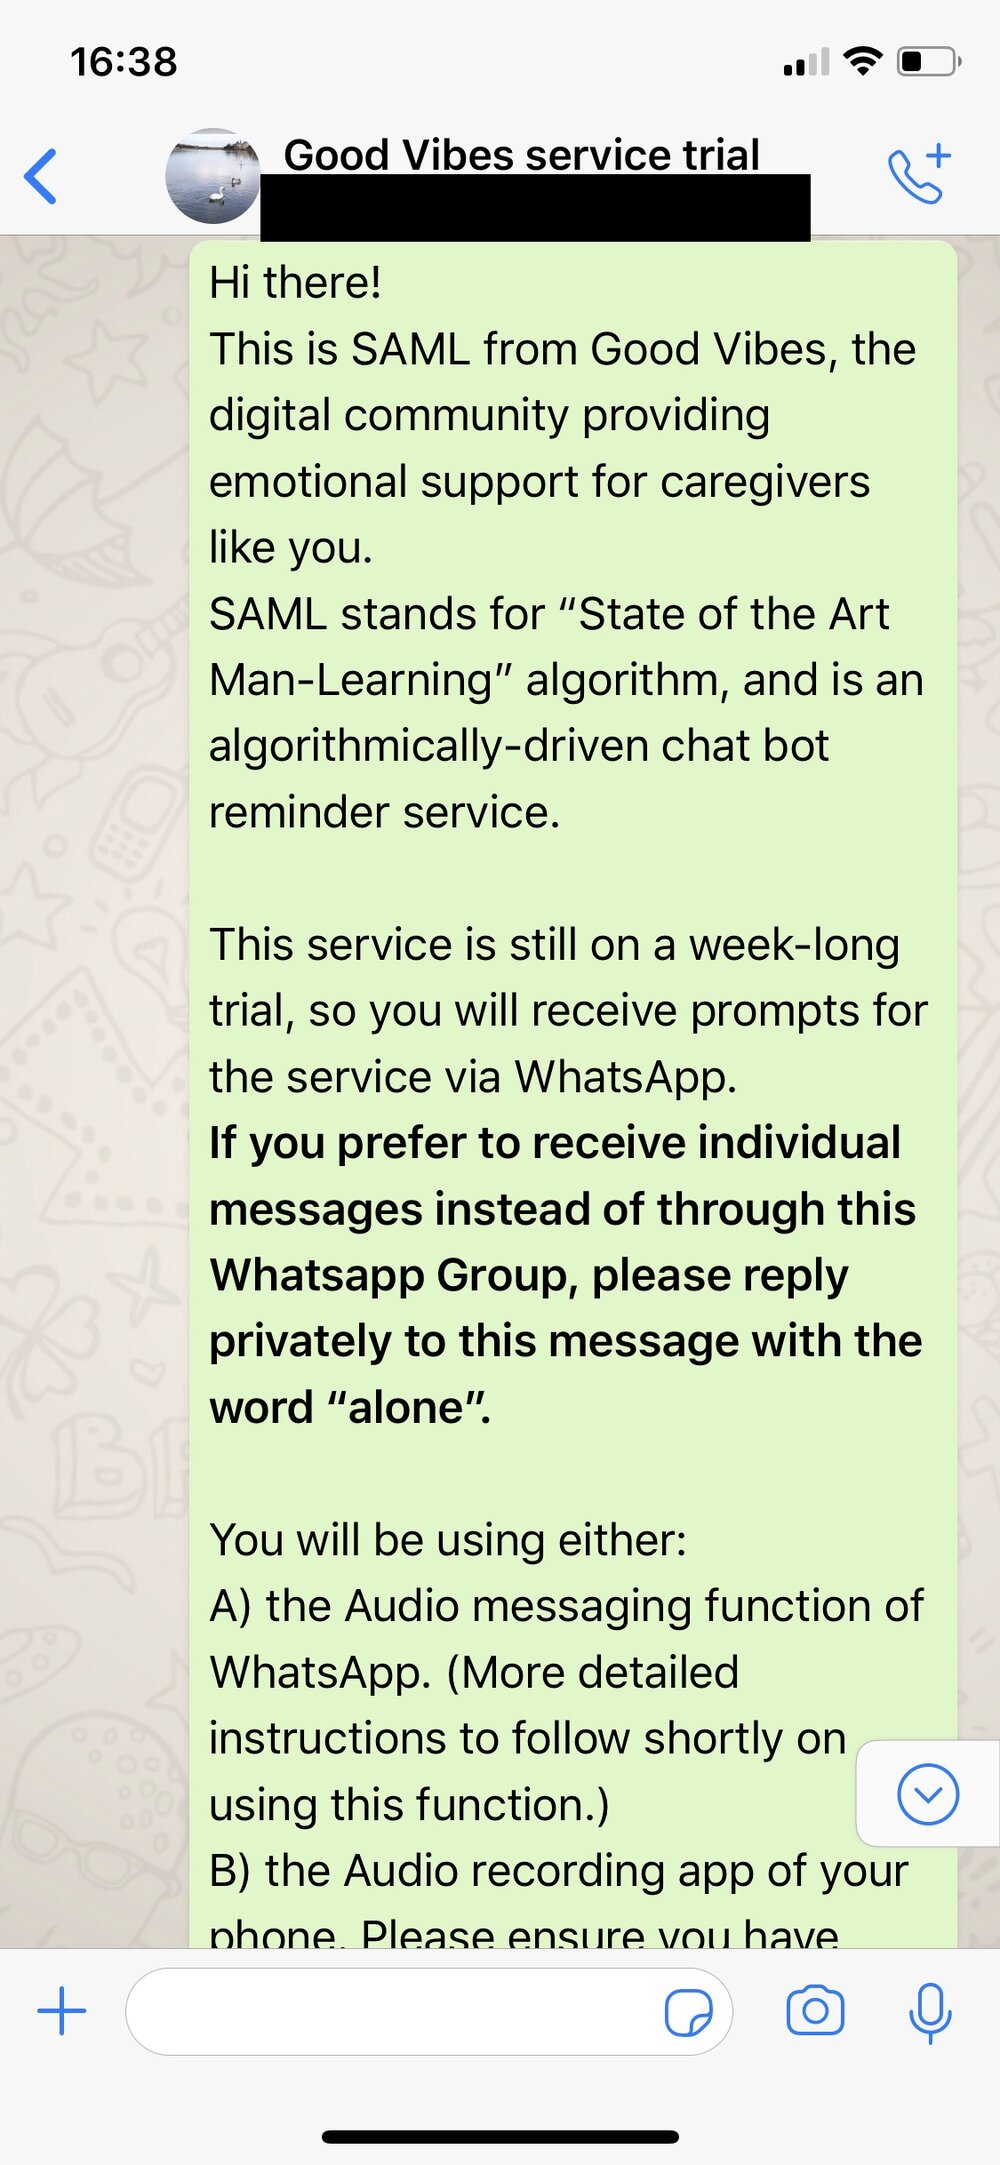
Evolution of Co-Worker Care Module This started with sharing of stories about residents, and was switched instead to vocal appreciation of colleagues due to constraints of privacy. To get more candid feedback, I dialled back fidelity while testing which aspect of solution should be digital vs. physical.The last trial involved WhatsApp audio messages, with me Wizard-of-Oz-ing as a machine-learning chat bot which sends prompts before, during and after the caregiver shifts.
10 Oct 19. The nucleus of Co-worker Care Module: started with the idea of sharing stories about residents, but changed to sharing stories about co-workers.
 21 Nov 19. To get more candid feedback and to find the right balance between the physical vs. digital, I made these lo-fi app screens to test with caregivers.
21 Nov 19. Screenshot of test with caregiver F. of both the physical and digital test-flows of co-worker and self-care modules. Whatsapp Chat Group test
25-29 Nov 19. To test the viability and receptiveness of caregivers to send audio messages of appreciation to each other.
Evolution of Self-Care Module The iterations for this were initially focused on just hearing messages from colleagues, as well as some breathing and relaxation exercises. But with caregiver feedback about the need for reflection and spotting patterns, it shifted towards a visual dashboard and the other screens.
22 Oct 19. Hi-Fidelity app screen allowing a caregiver to hear a co-worker’s audio message
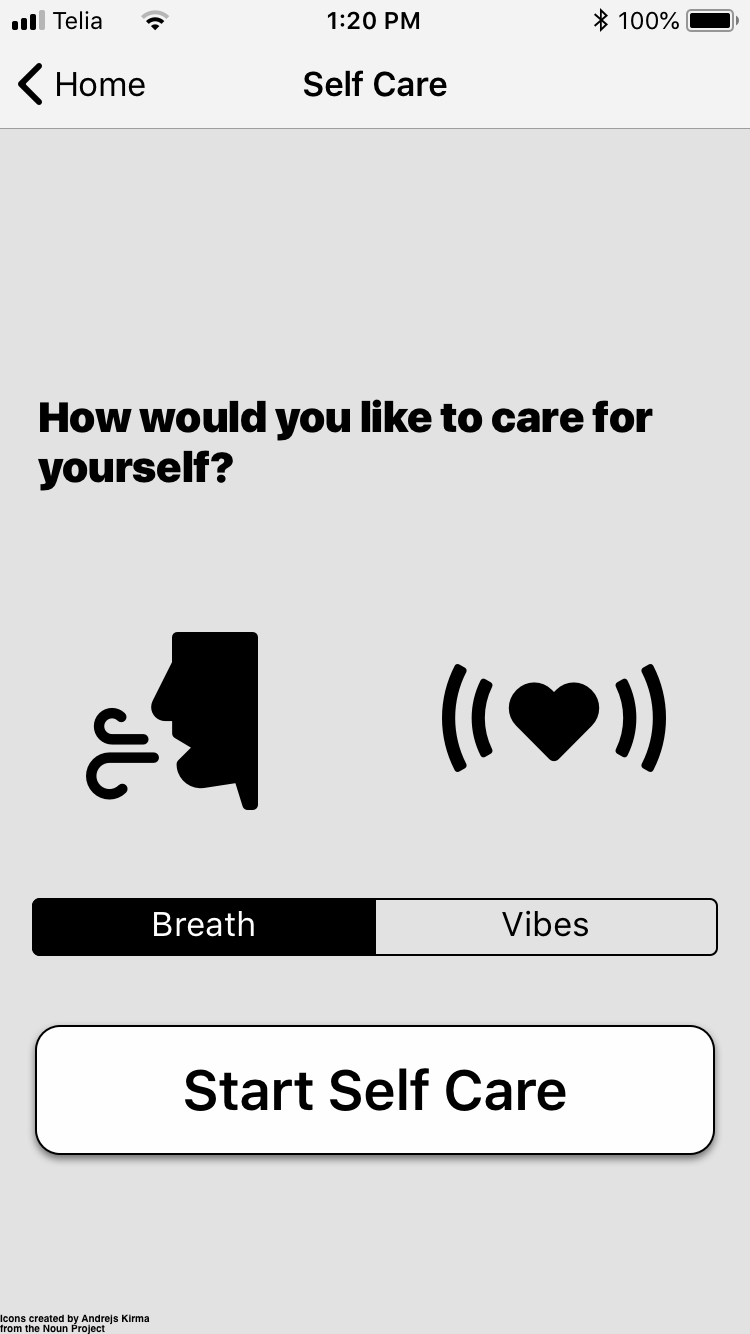
 13 Nov 19. Another hi-fi app screen, allowing the caregiver to choose between guided breath meditation or a haptic massage
 Lo-Fi Mood Dashboard
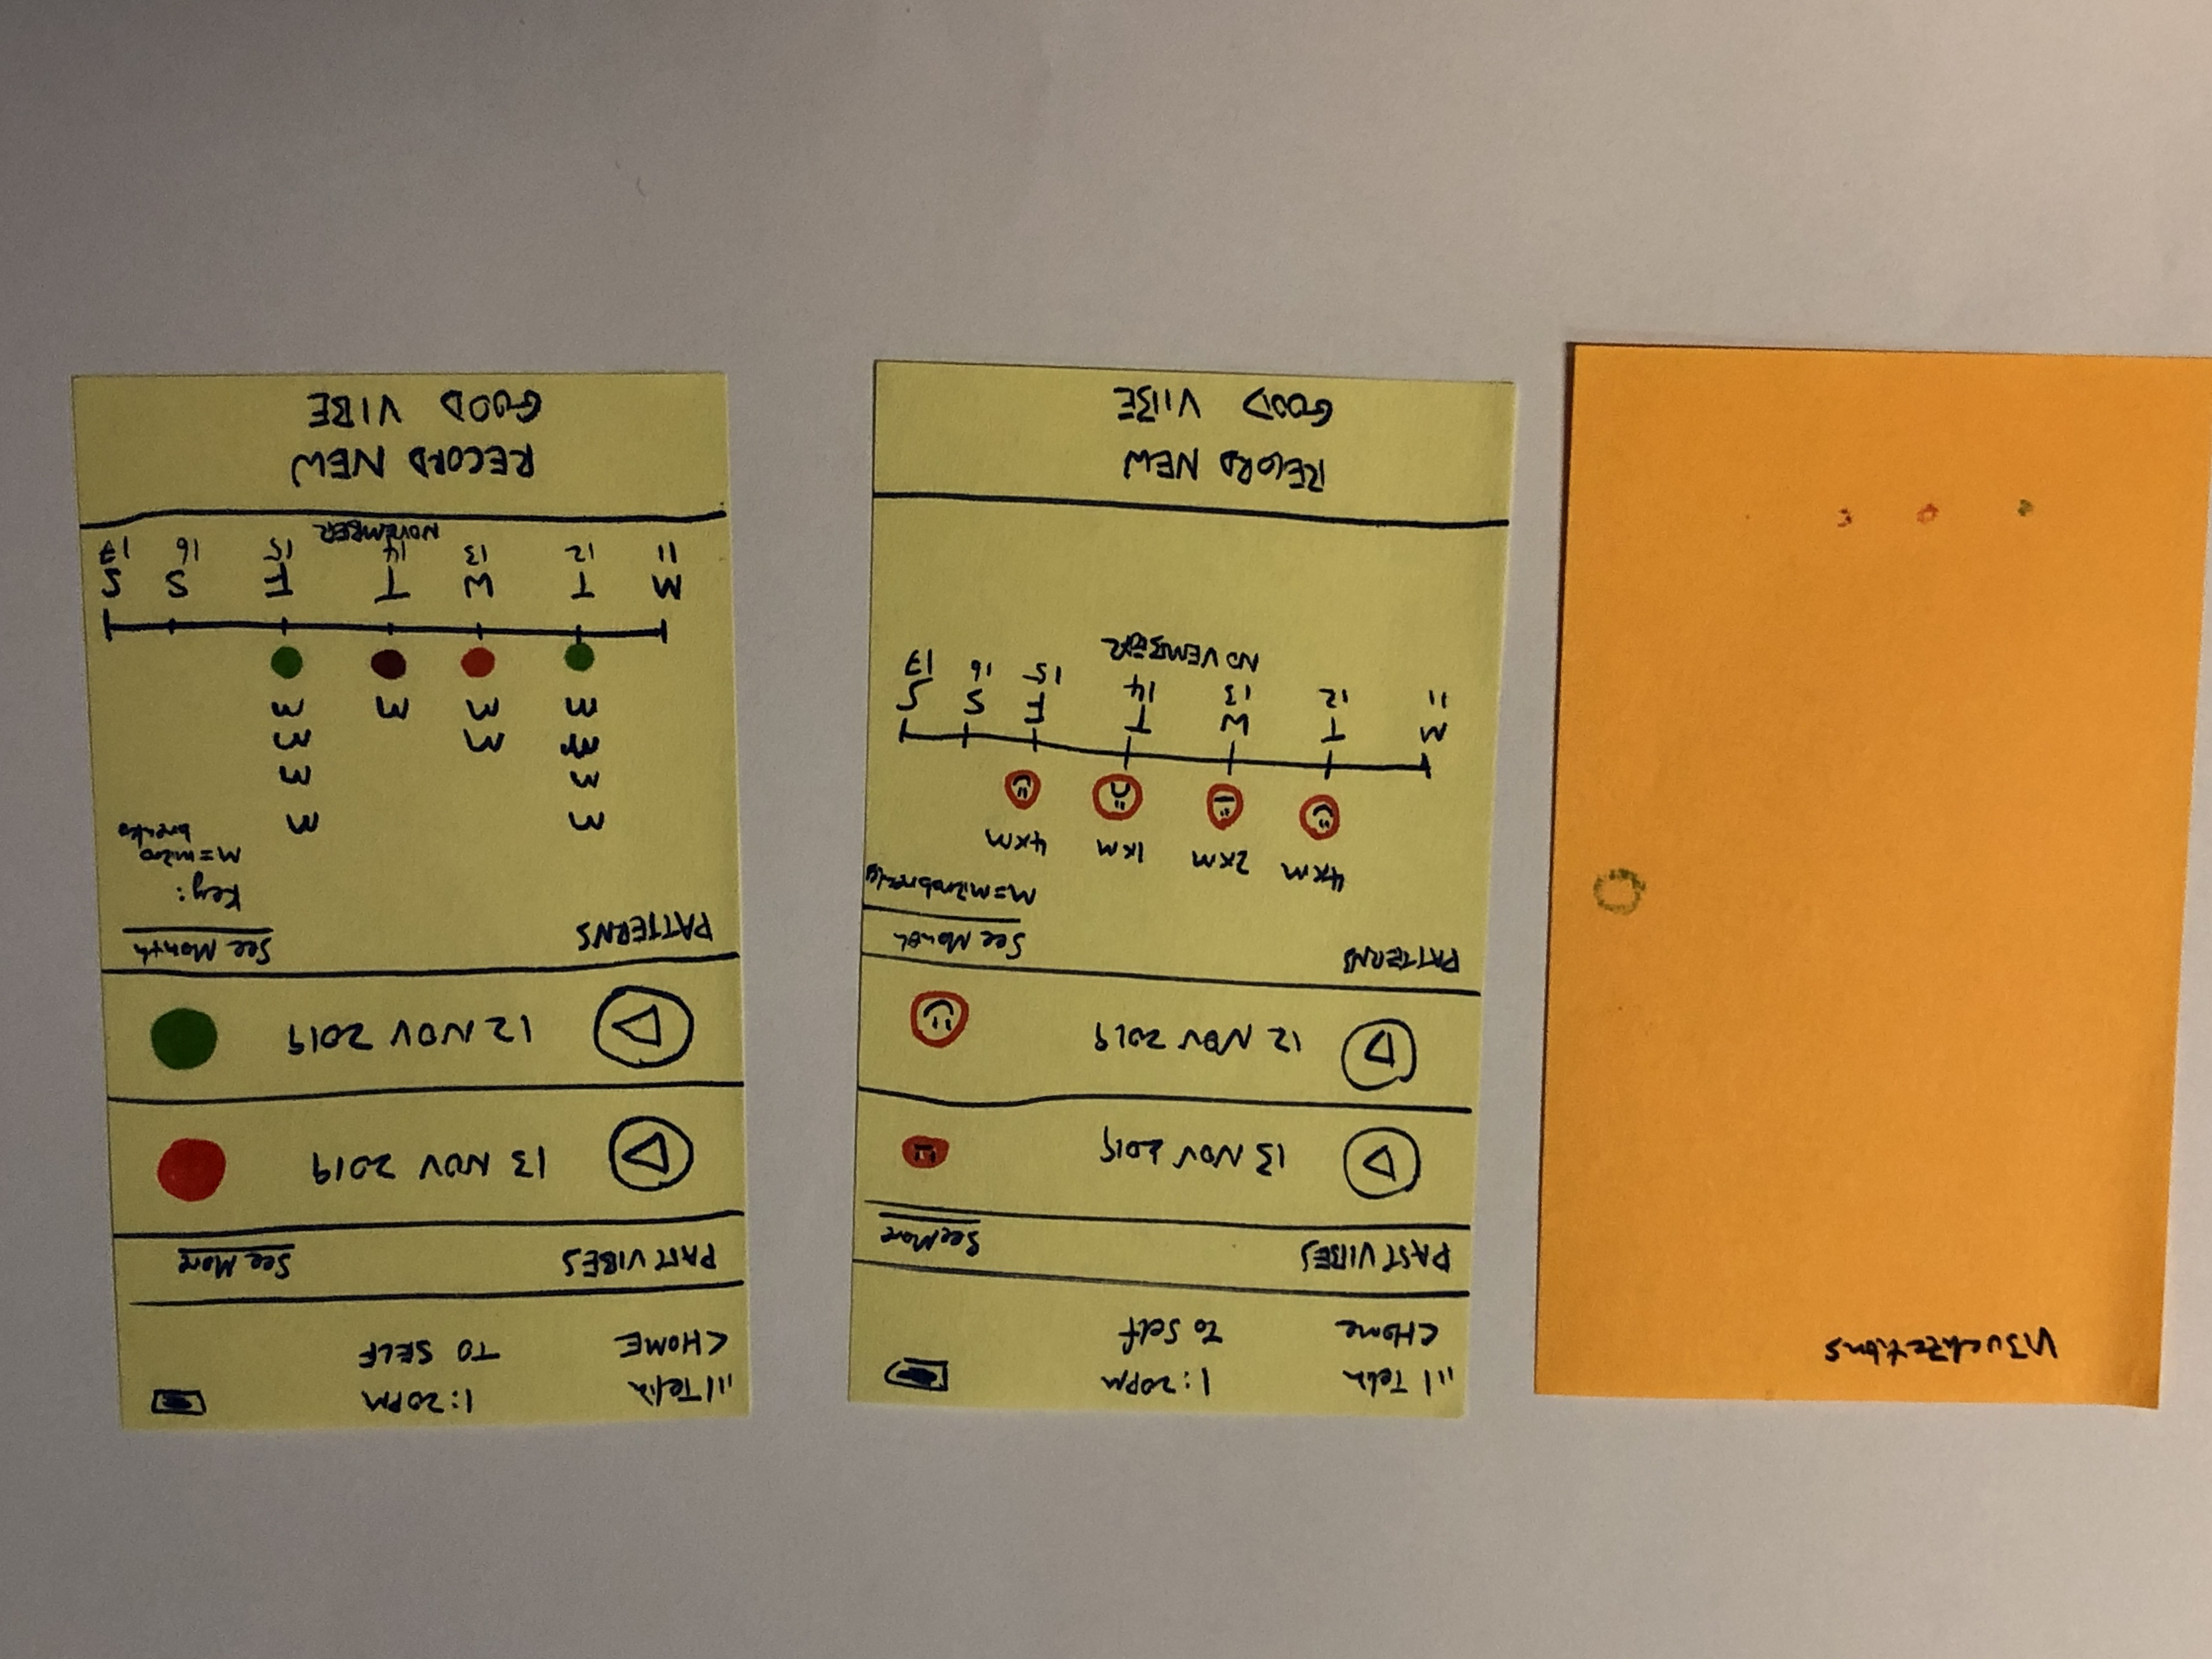
 21 Nov 19. From the co-creation feedback, there was a need for mood-tracking and reflection. These Post-It screens were created as part of the test with caregiver F.
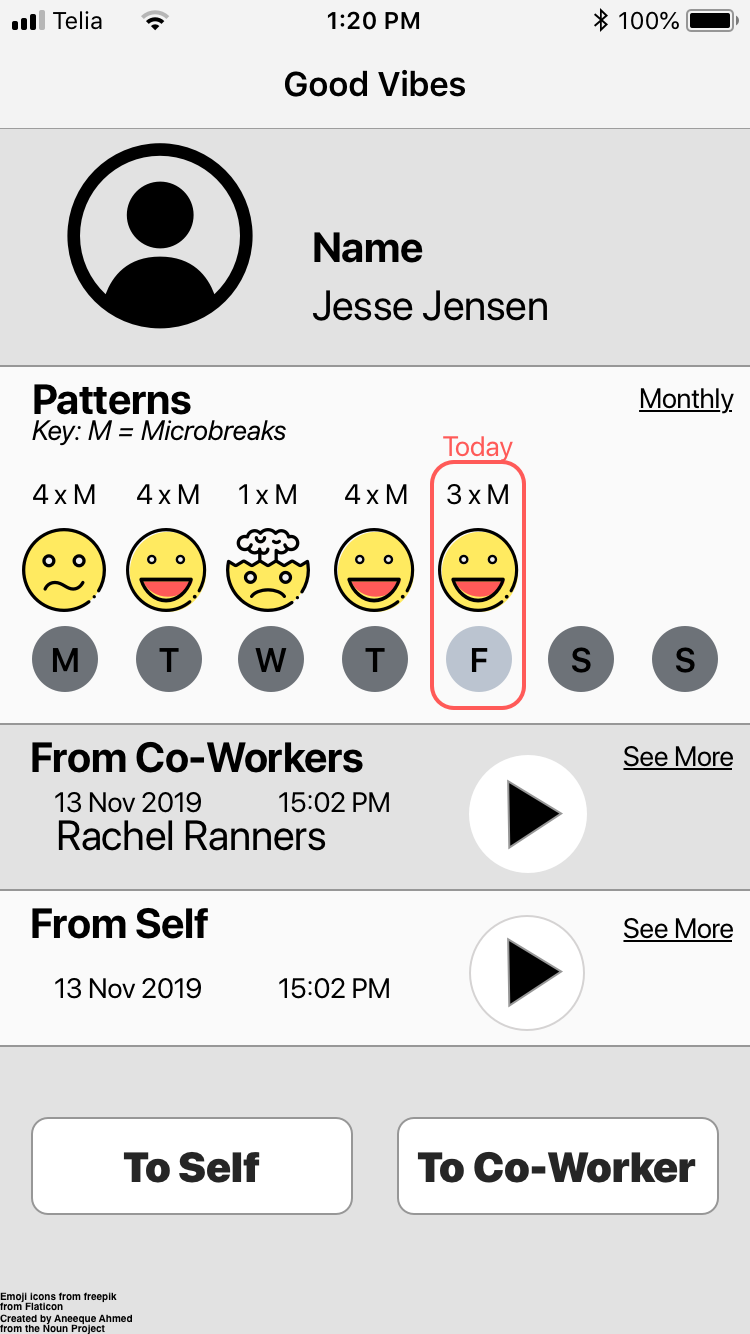
 25 Nov 19. Based on caregivers’ preference of emojis, this is a high-fidelity version of the dashboard
Evolution & Construction of Microbreak Station Module I first iterated by using an animated screen with a physical chestnut. Then I tried using a digital chestnut, in order to explore the balance between digital vs physical.
Finally, I taped a vibration motor onto a chestnut, slapped a Post It on a box, and used that to test the interaction.
Remaining pictures show the process of building the final prototype.
22 Oct 19. An early version of the “chestnut” involved an actual chestnut, with an animated mobile app screen
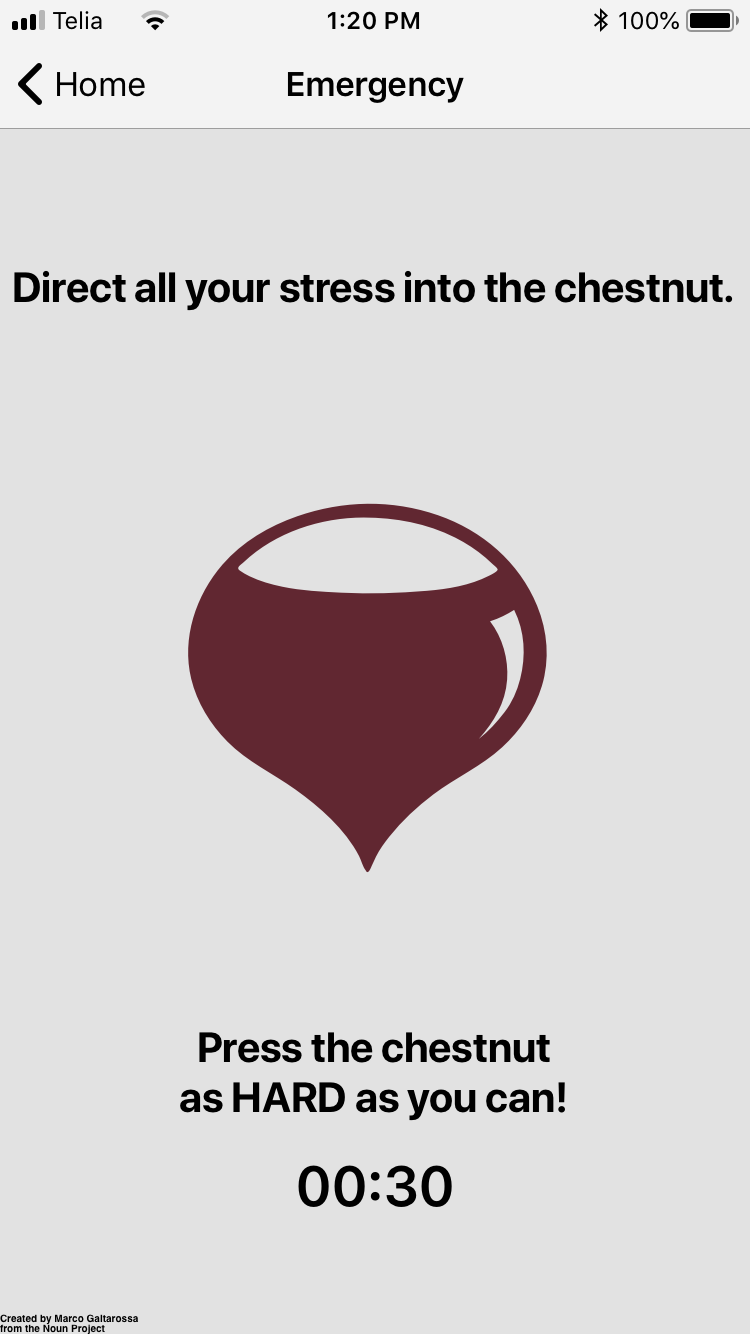
 13 Nov 19. I created this screen to test if a chestnut could be on a digital screen: it didn’t have the same effect.
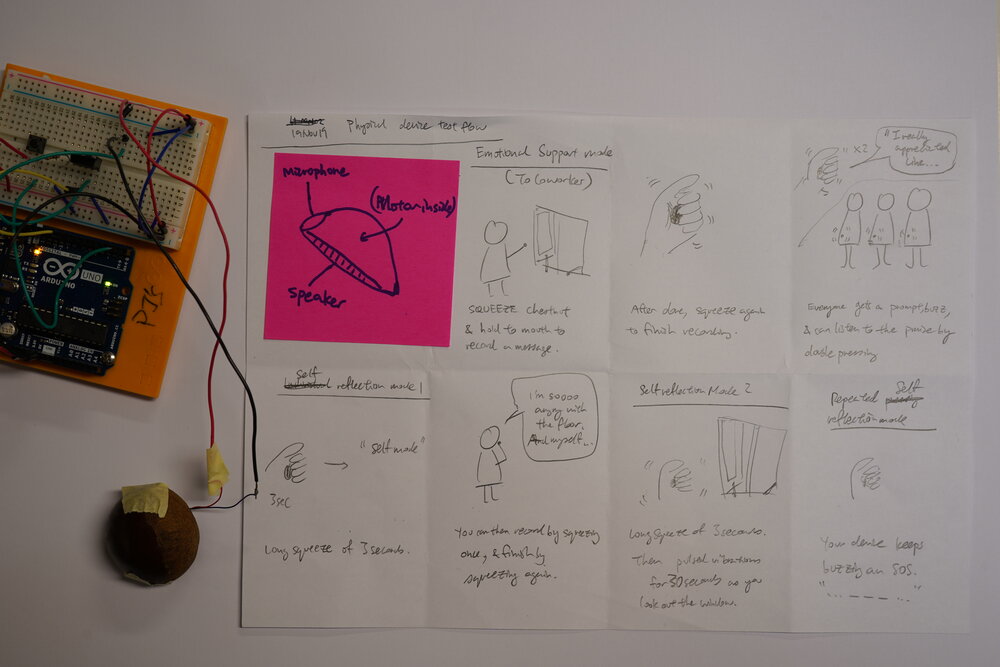
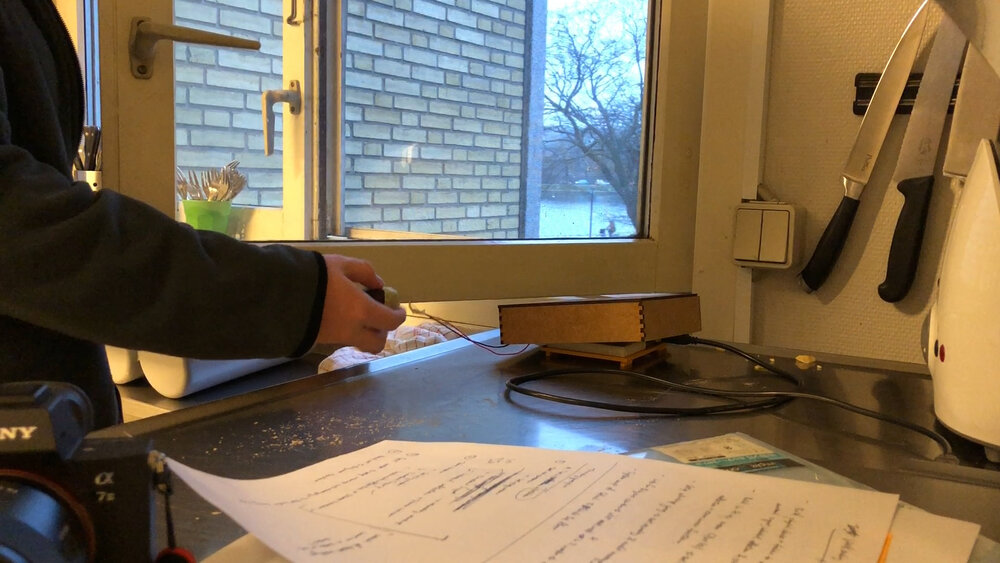
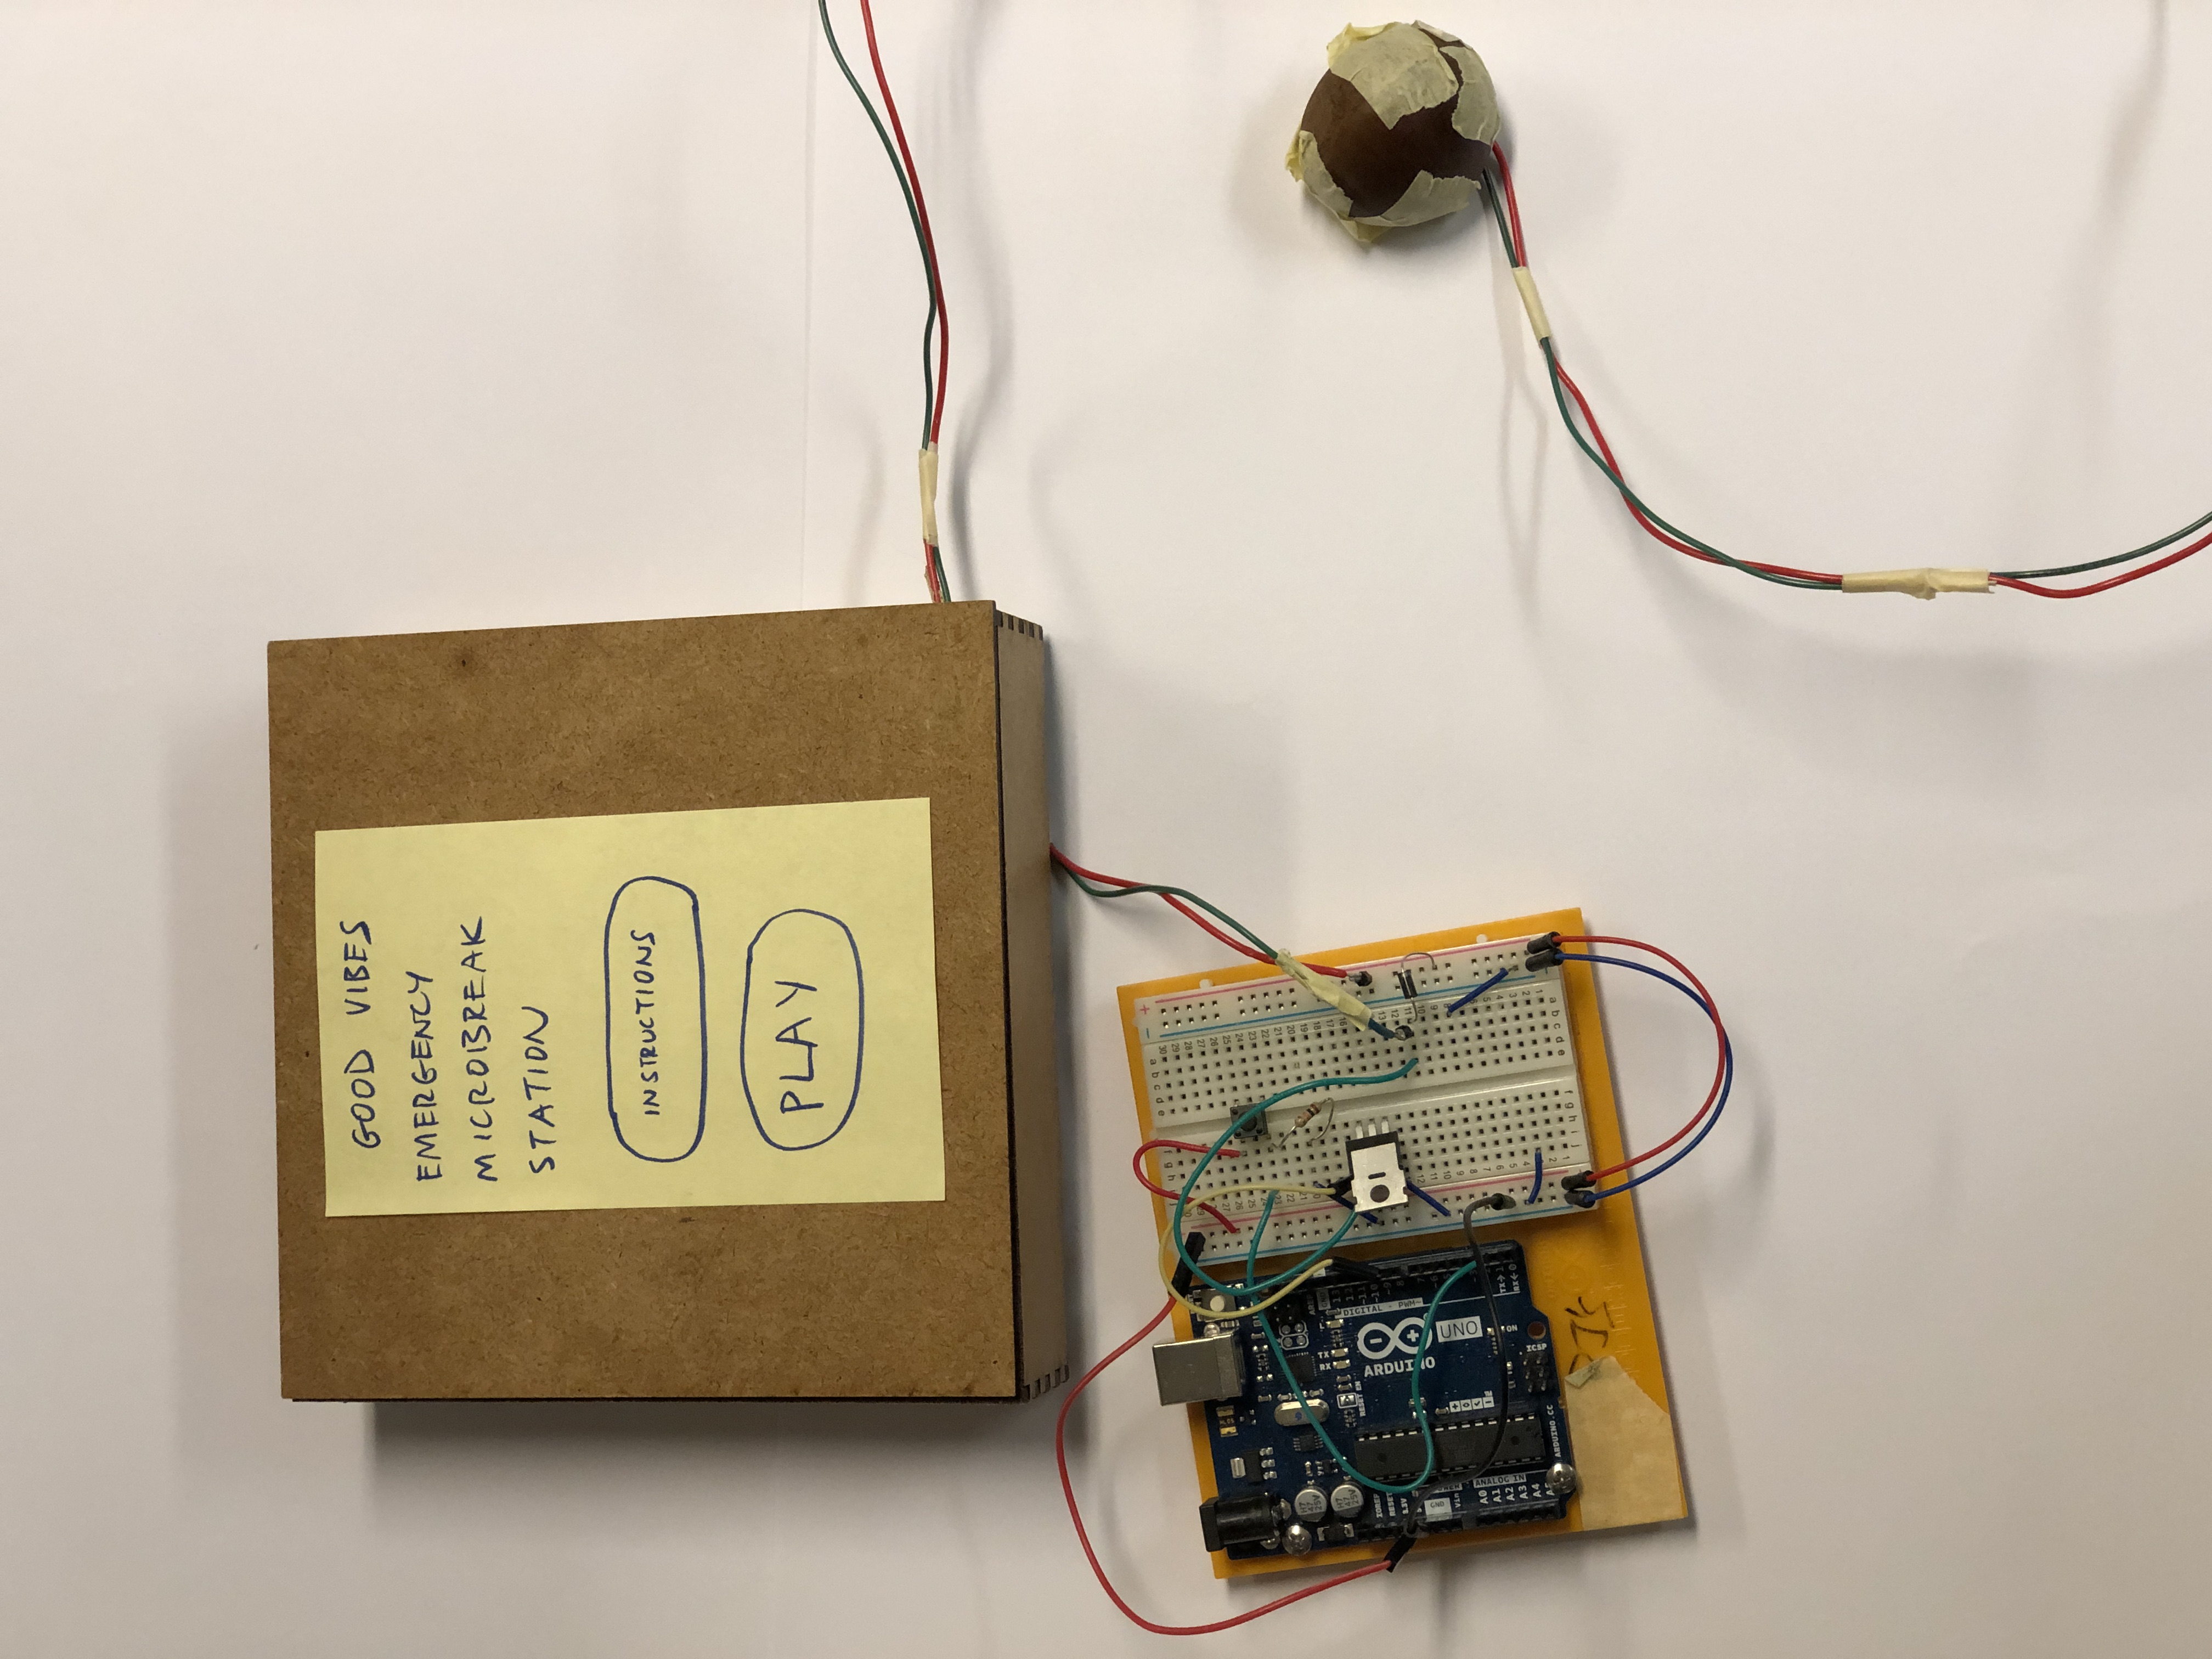
 21-27 Nov 19. This was my most widely-used test setup: an Arduino, an old MDF box from a previous project, a real chestnut, with a vibration motor taped to it. This was used to test the physical flows, but also the effect of the haptics on the caregivers (as shown in the validation video).
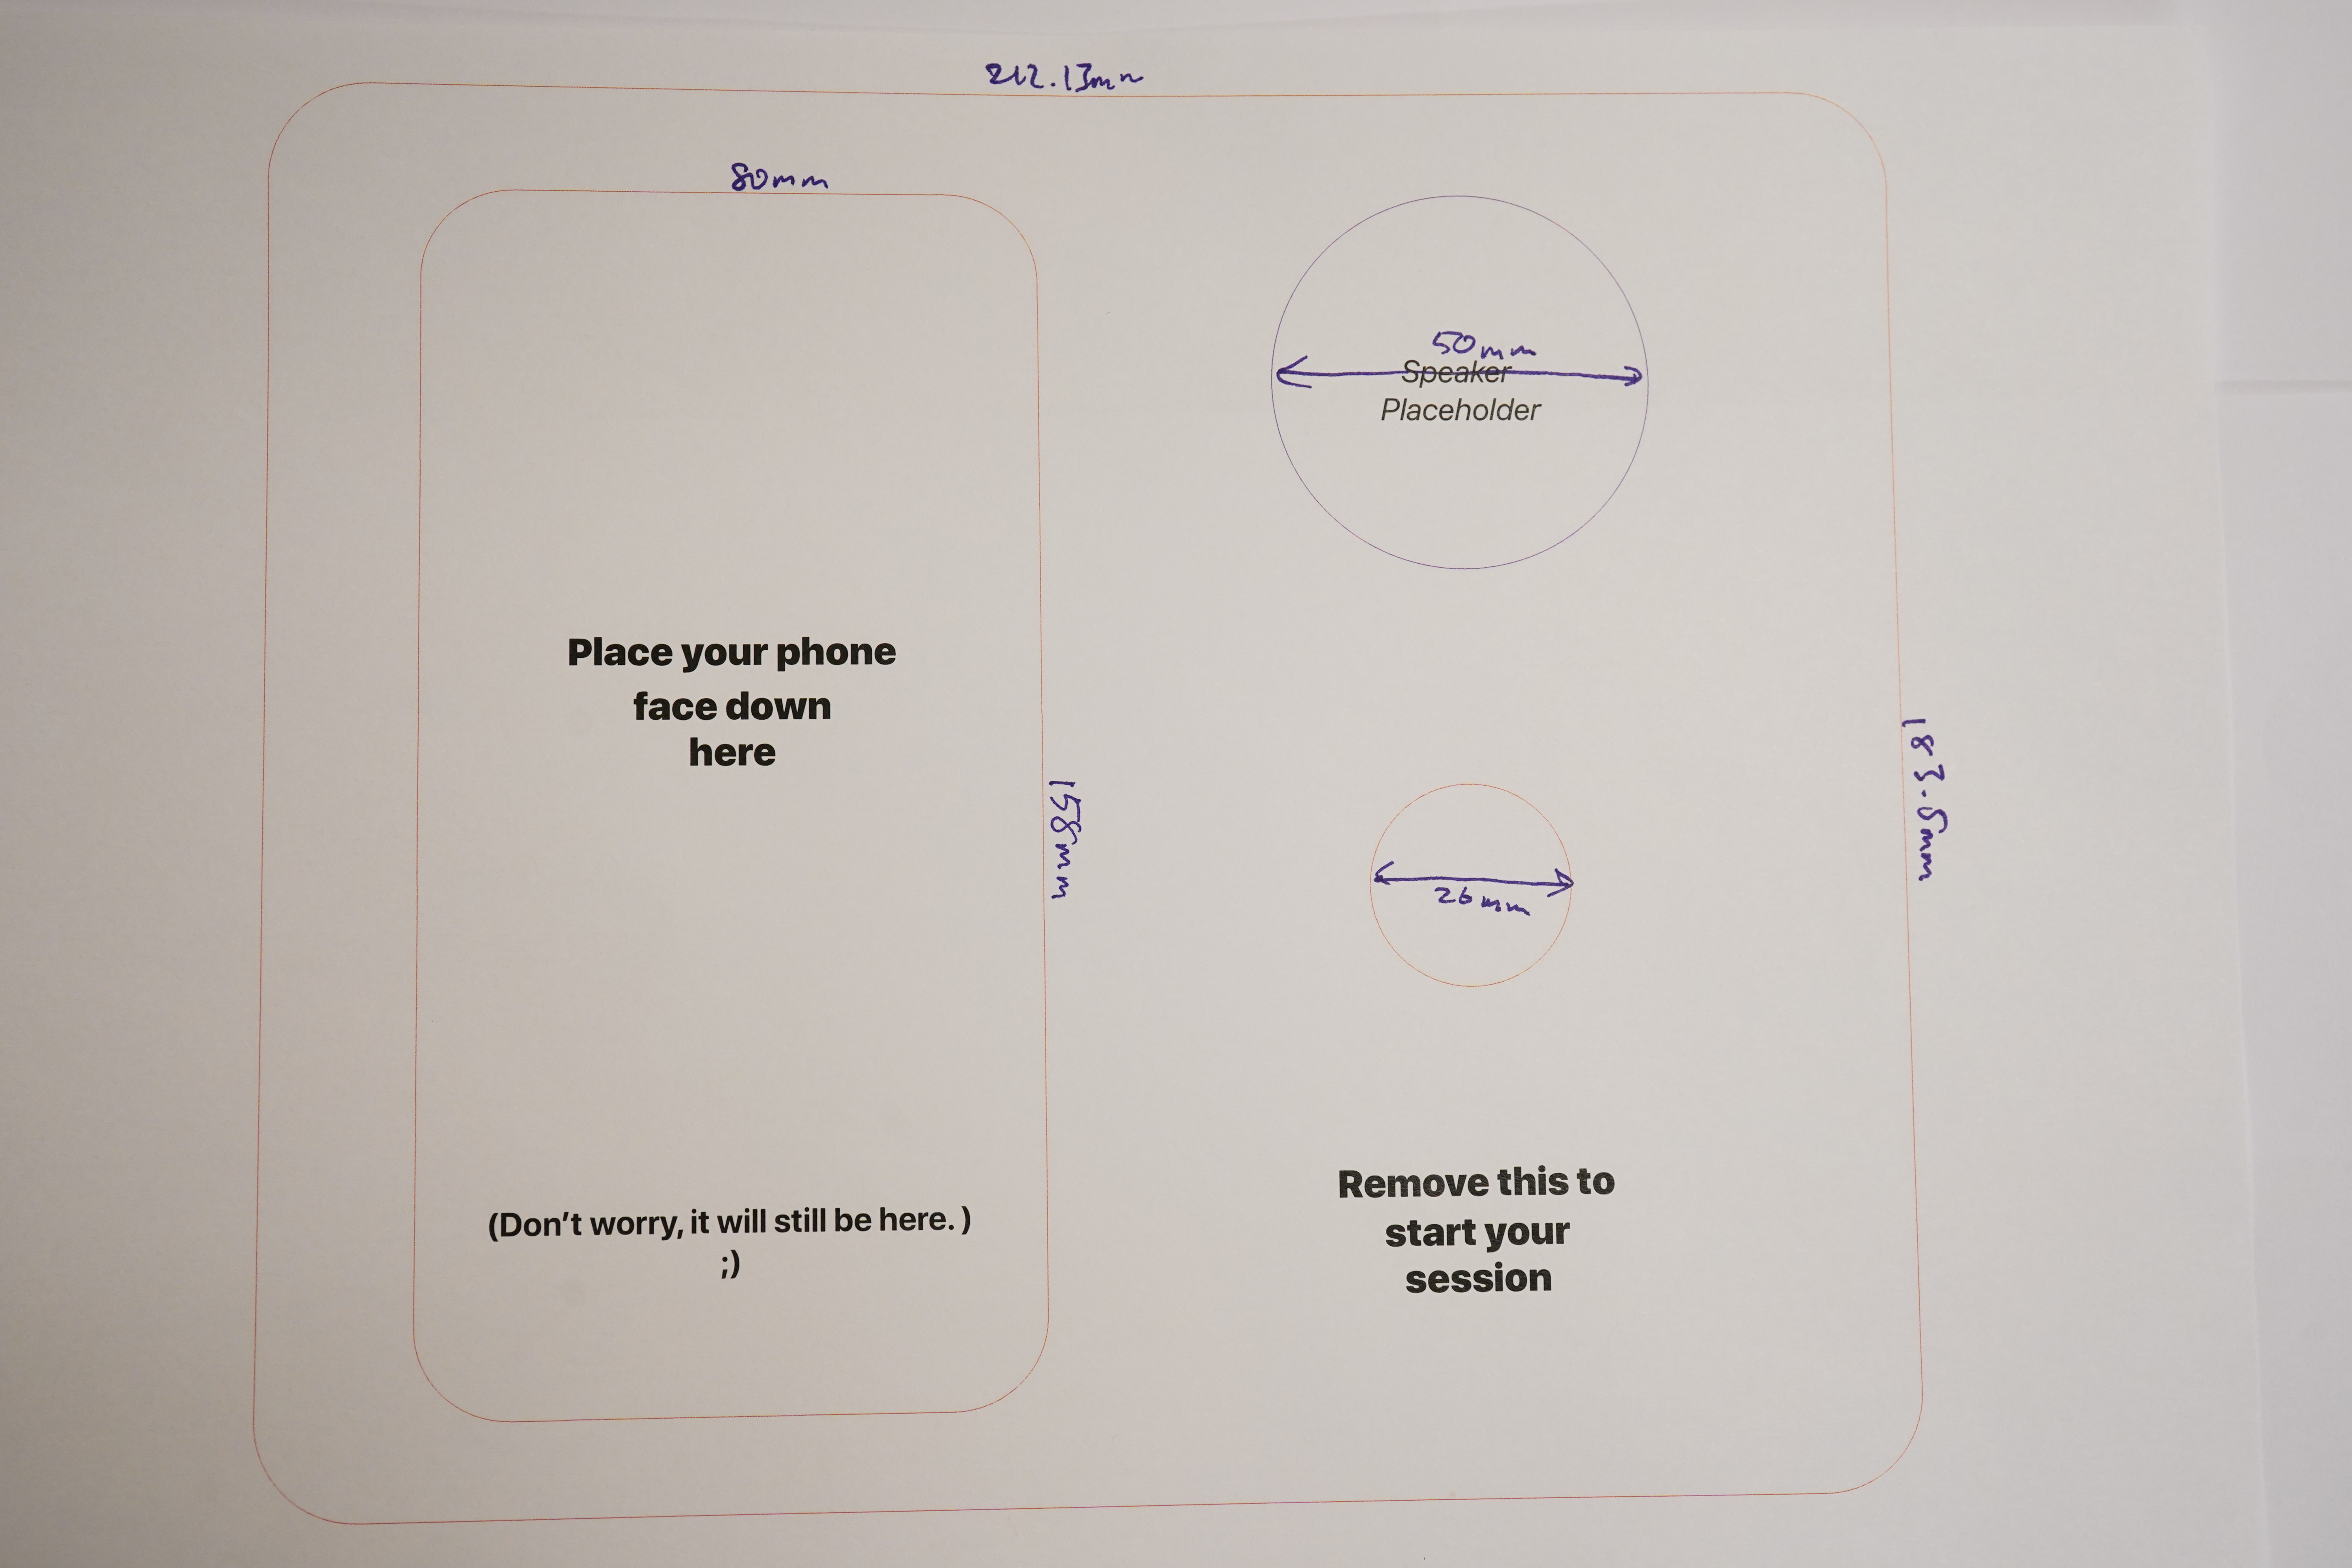
Construction plan of the Microbreak Station Module. Paper printout of the Illustrator file, which was subsequently used for the MDF construction
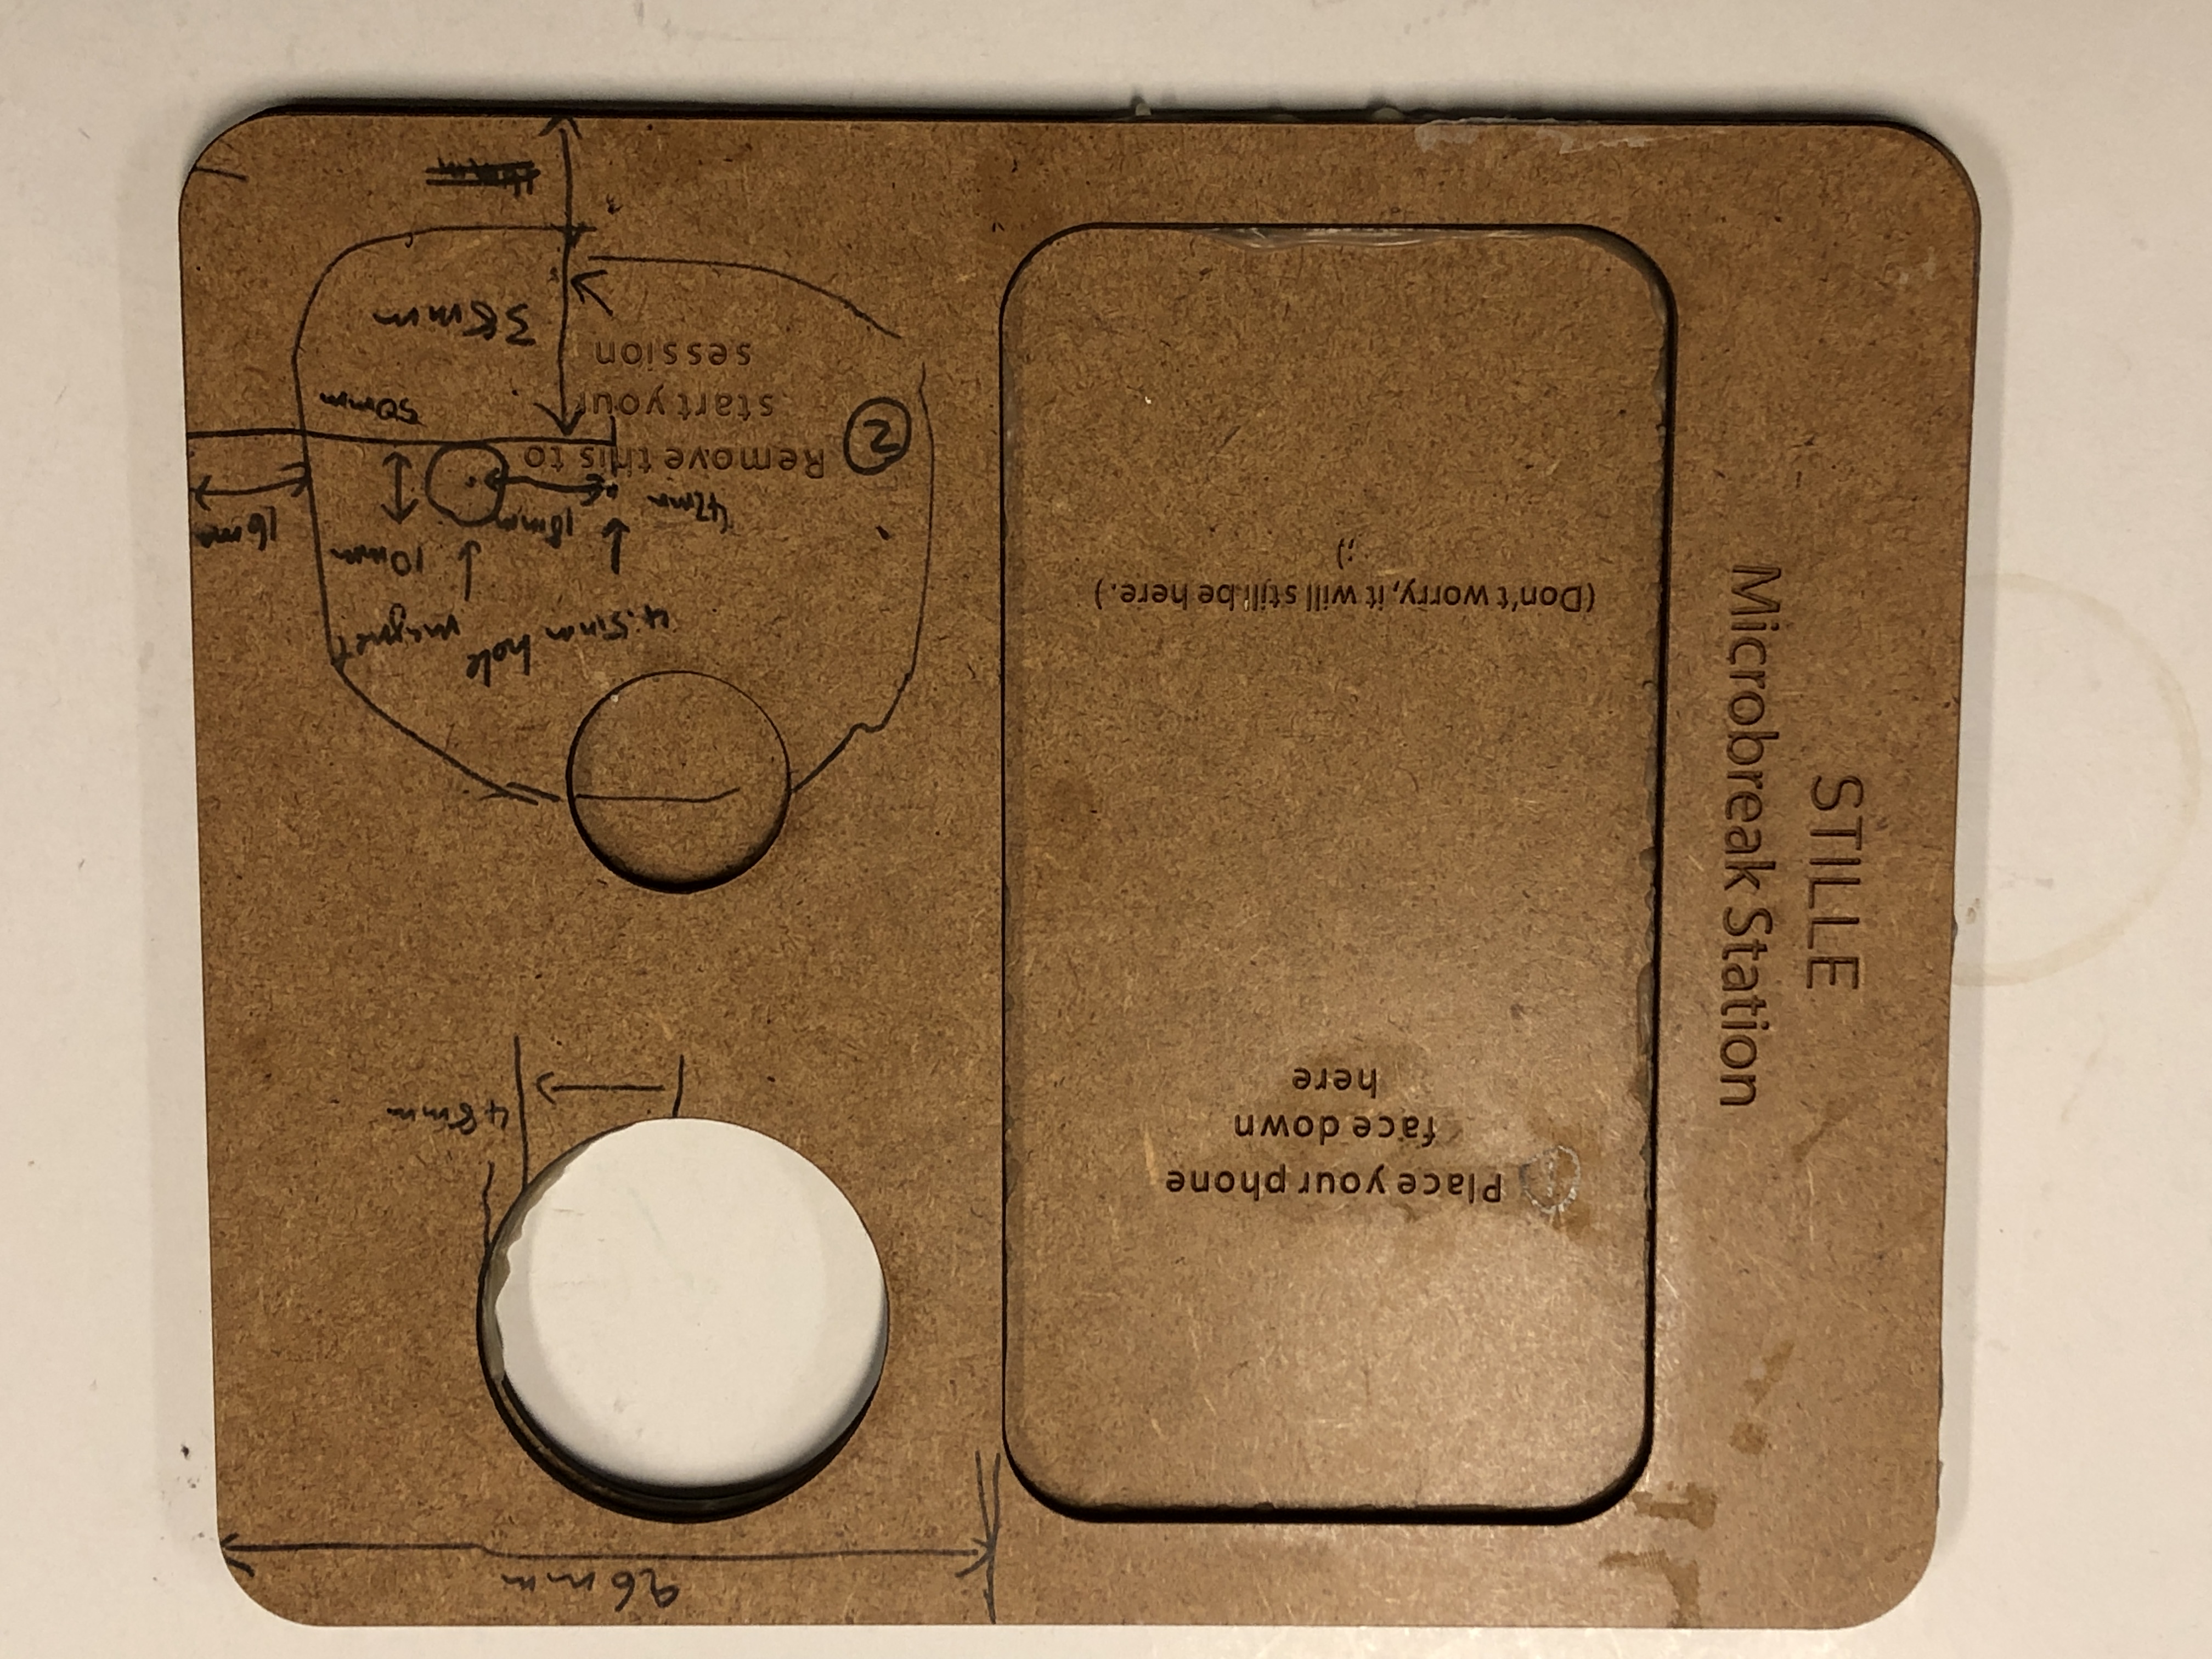
 MDF prototype, with correction markings and measurements
 Making of the “chestnut”
Making “chestnut”
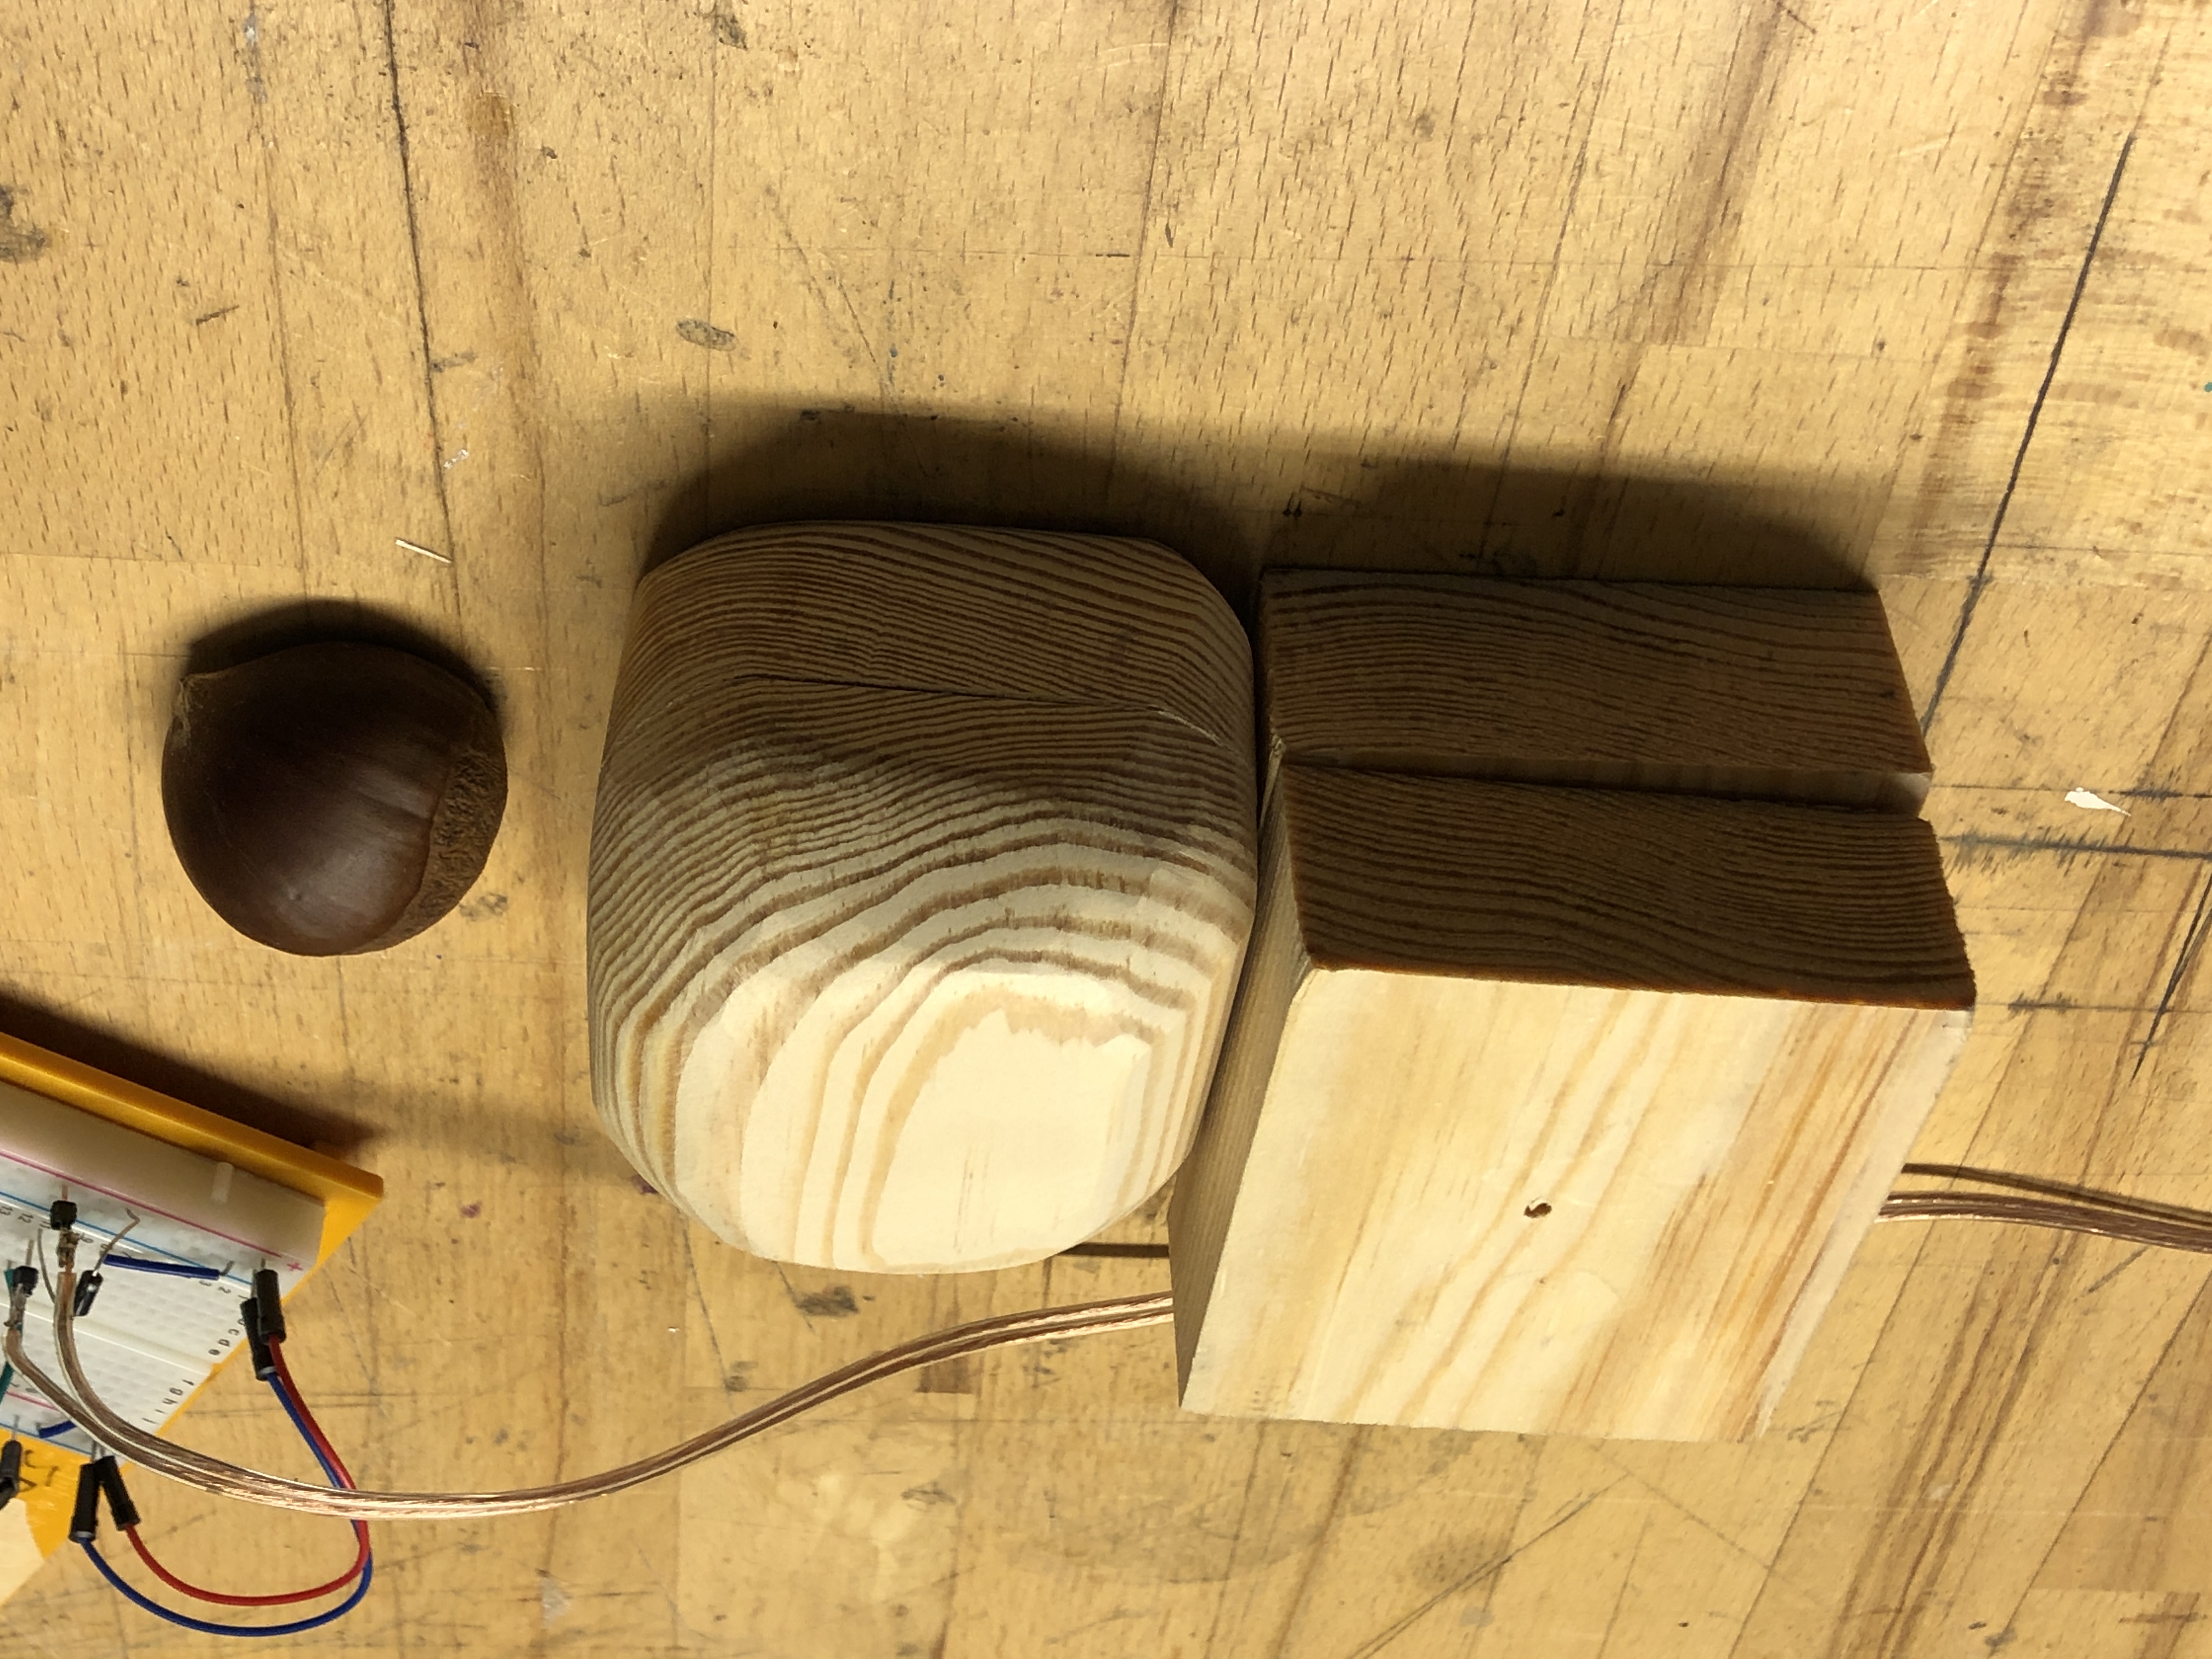
 Unsanded box, sanded “chestnut” and actual chestnut, with Arduino circuit in the background
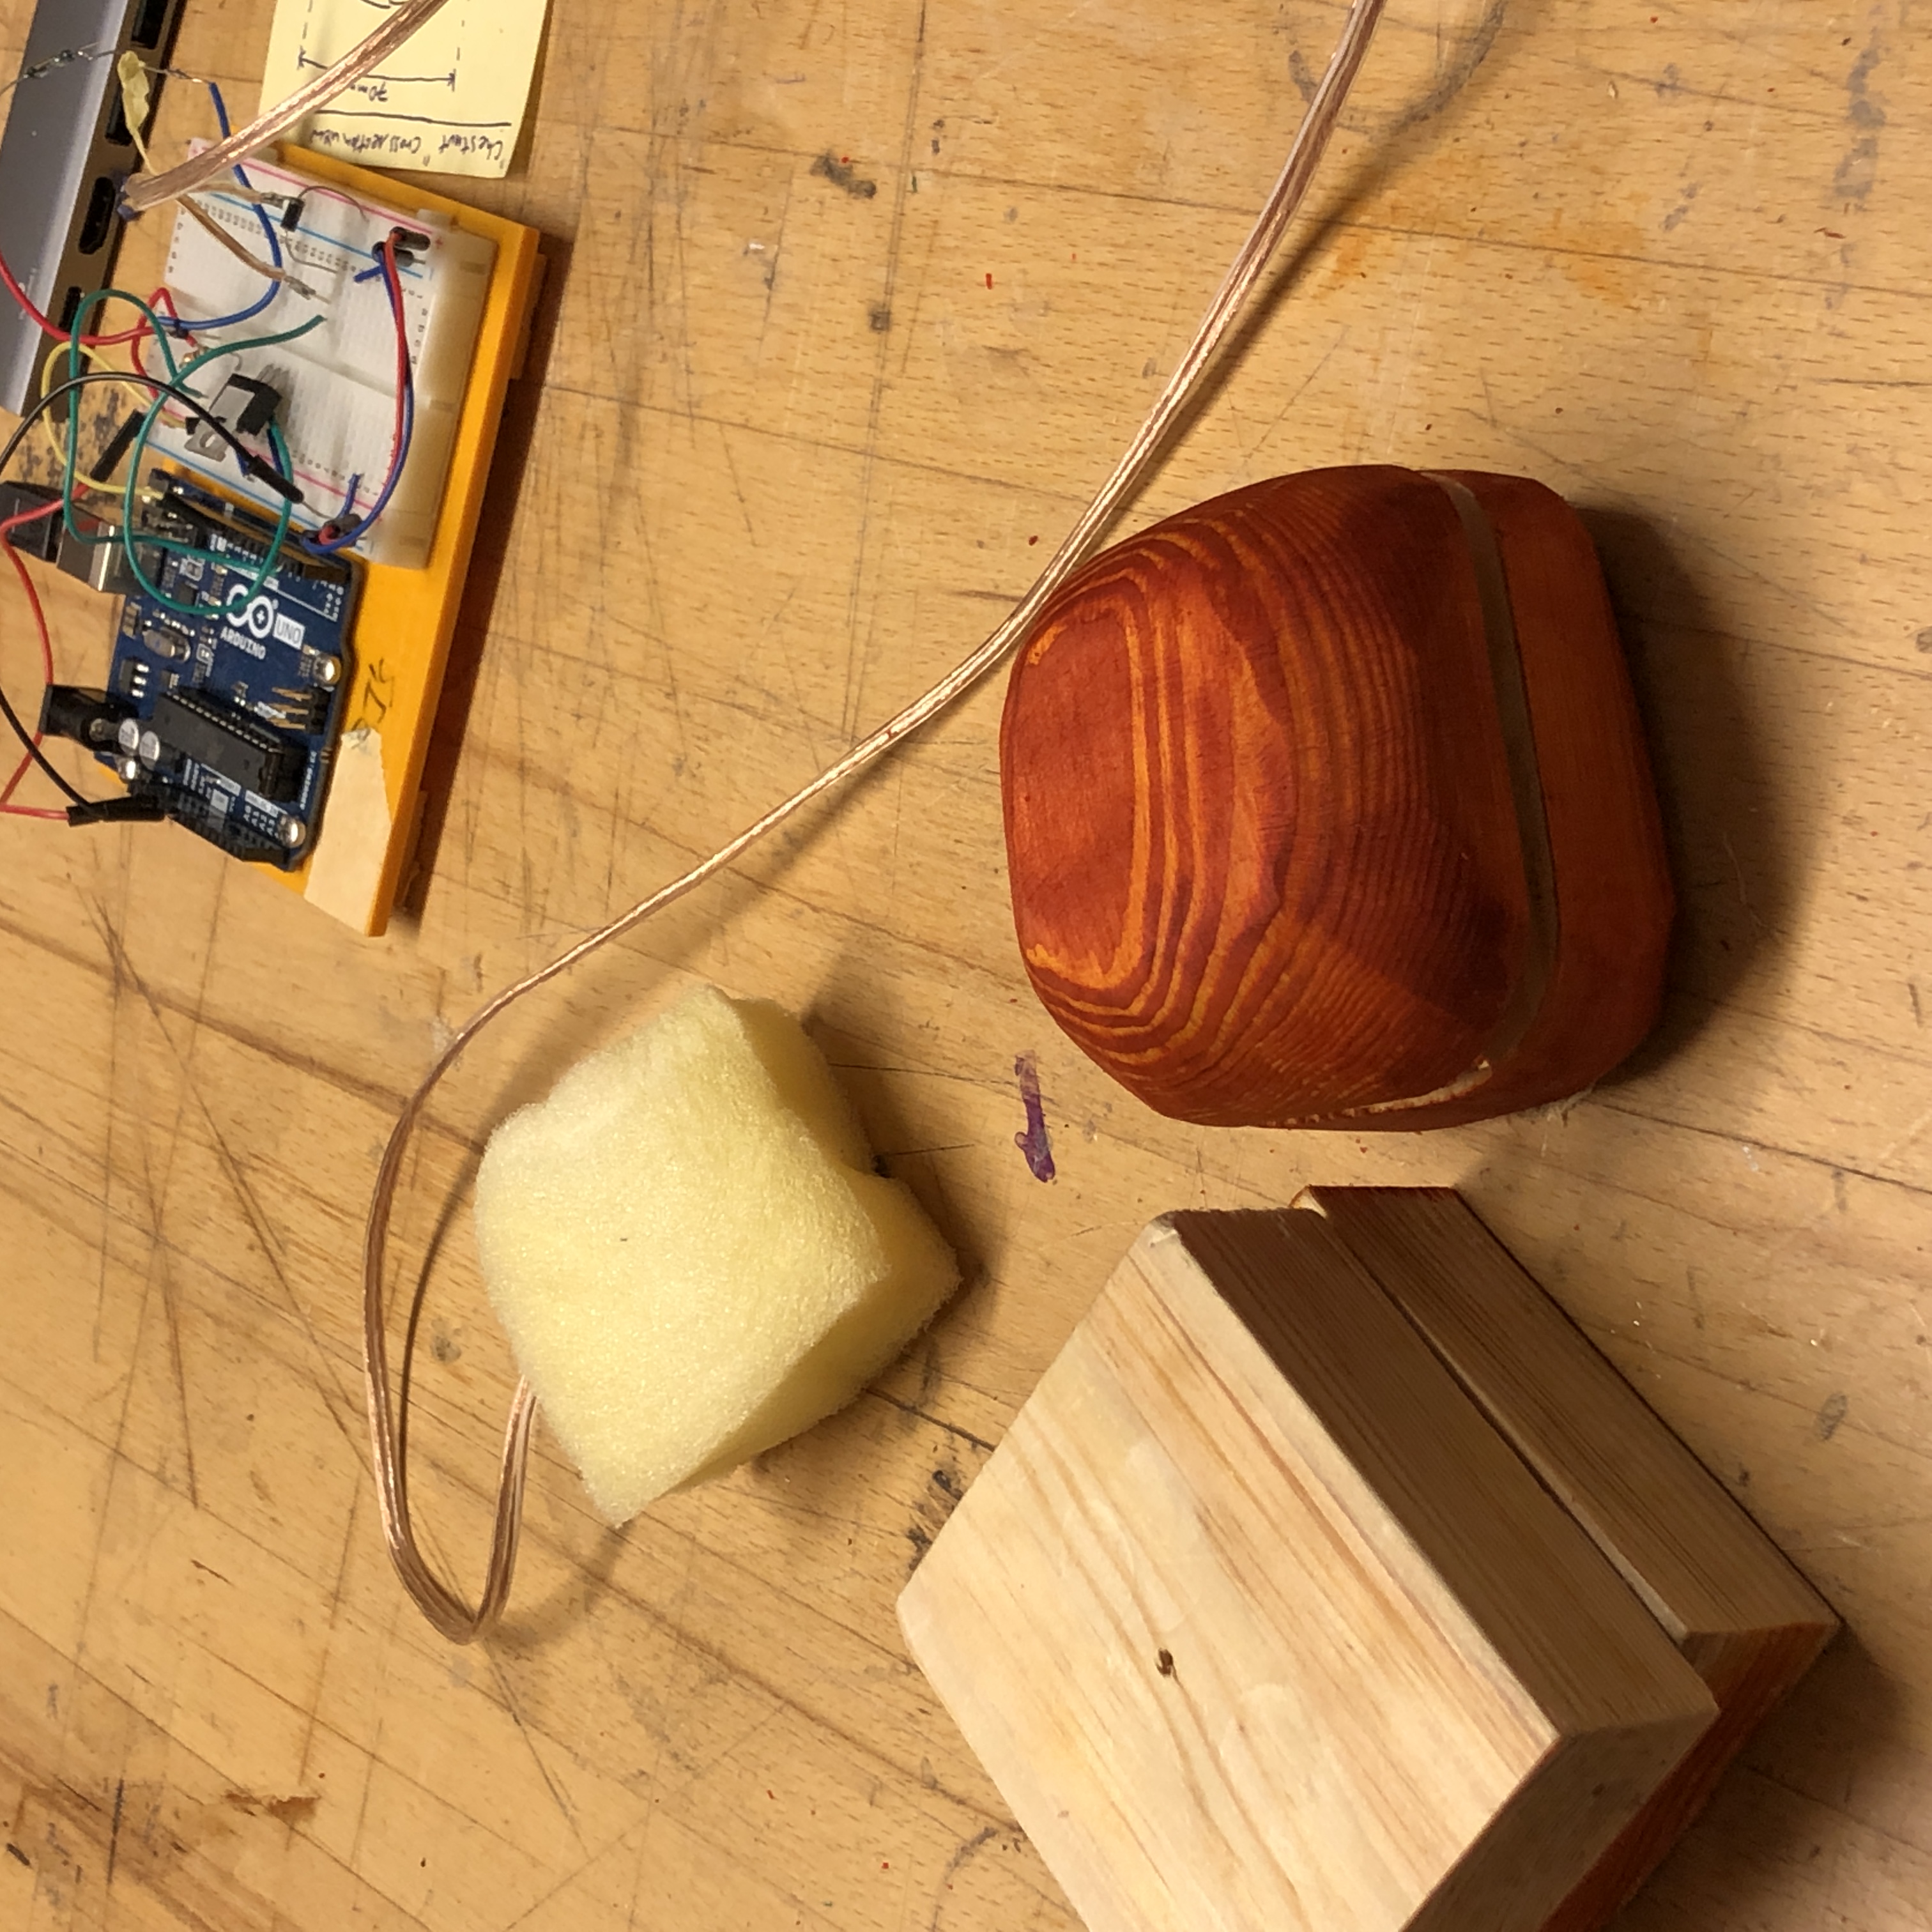
The “chestnut”, with the vibration motor and padding. On the righthand side is the Arduino circuit, with the “chestnut” construction plan in the Post It below.
 Just before the final assembly: the unsanded box, the “chestnut” (after two days of cured linseed oil varnish), with the vibration motor+padding above it, and finally the Arduino circuit
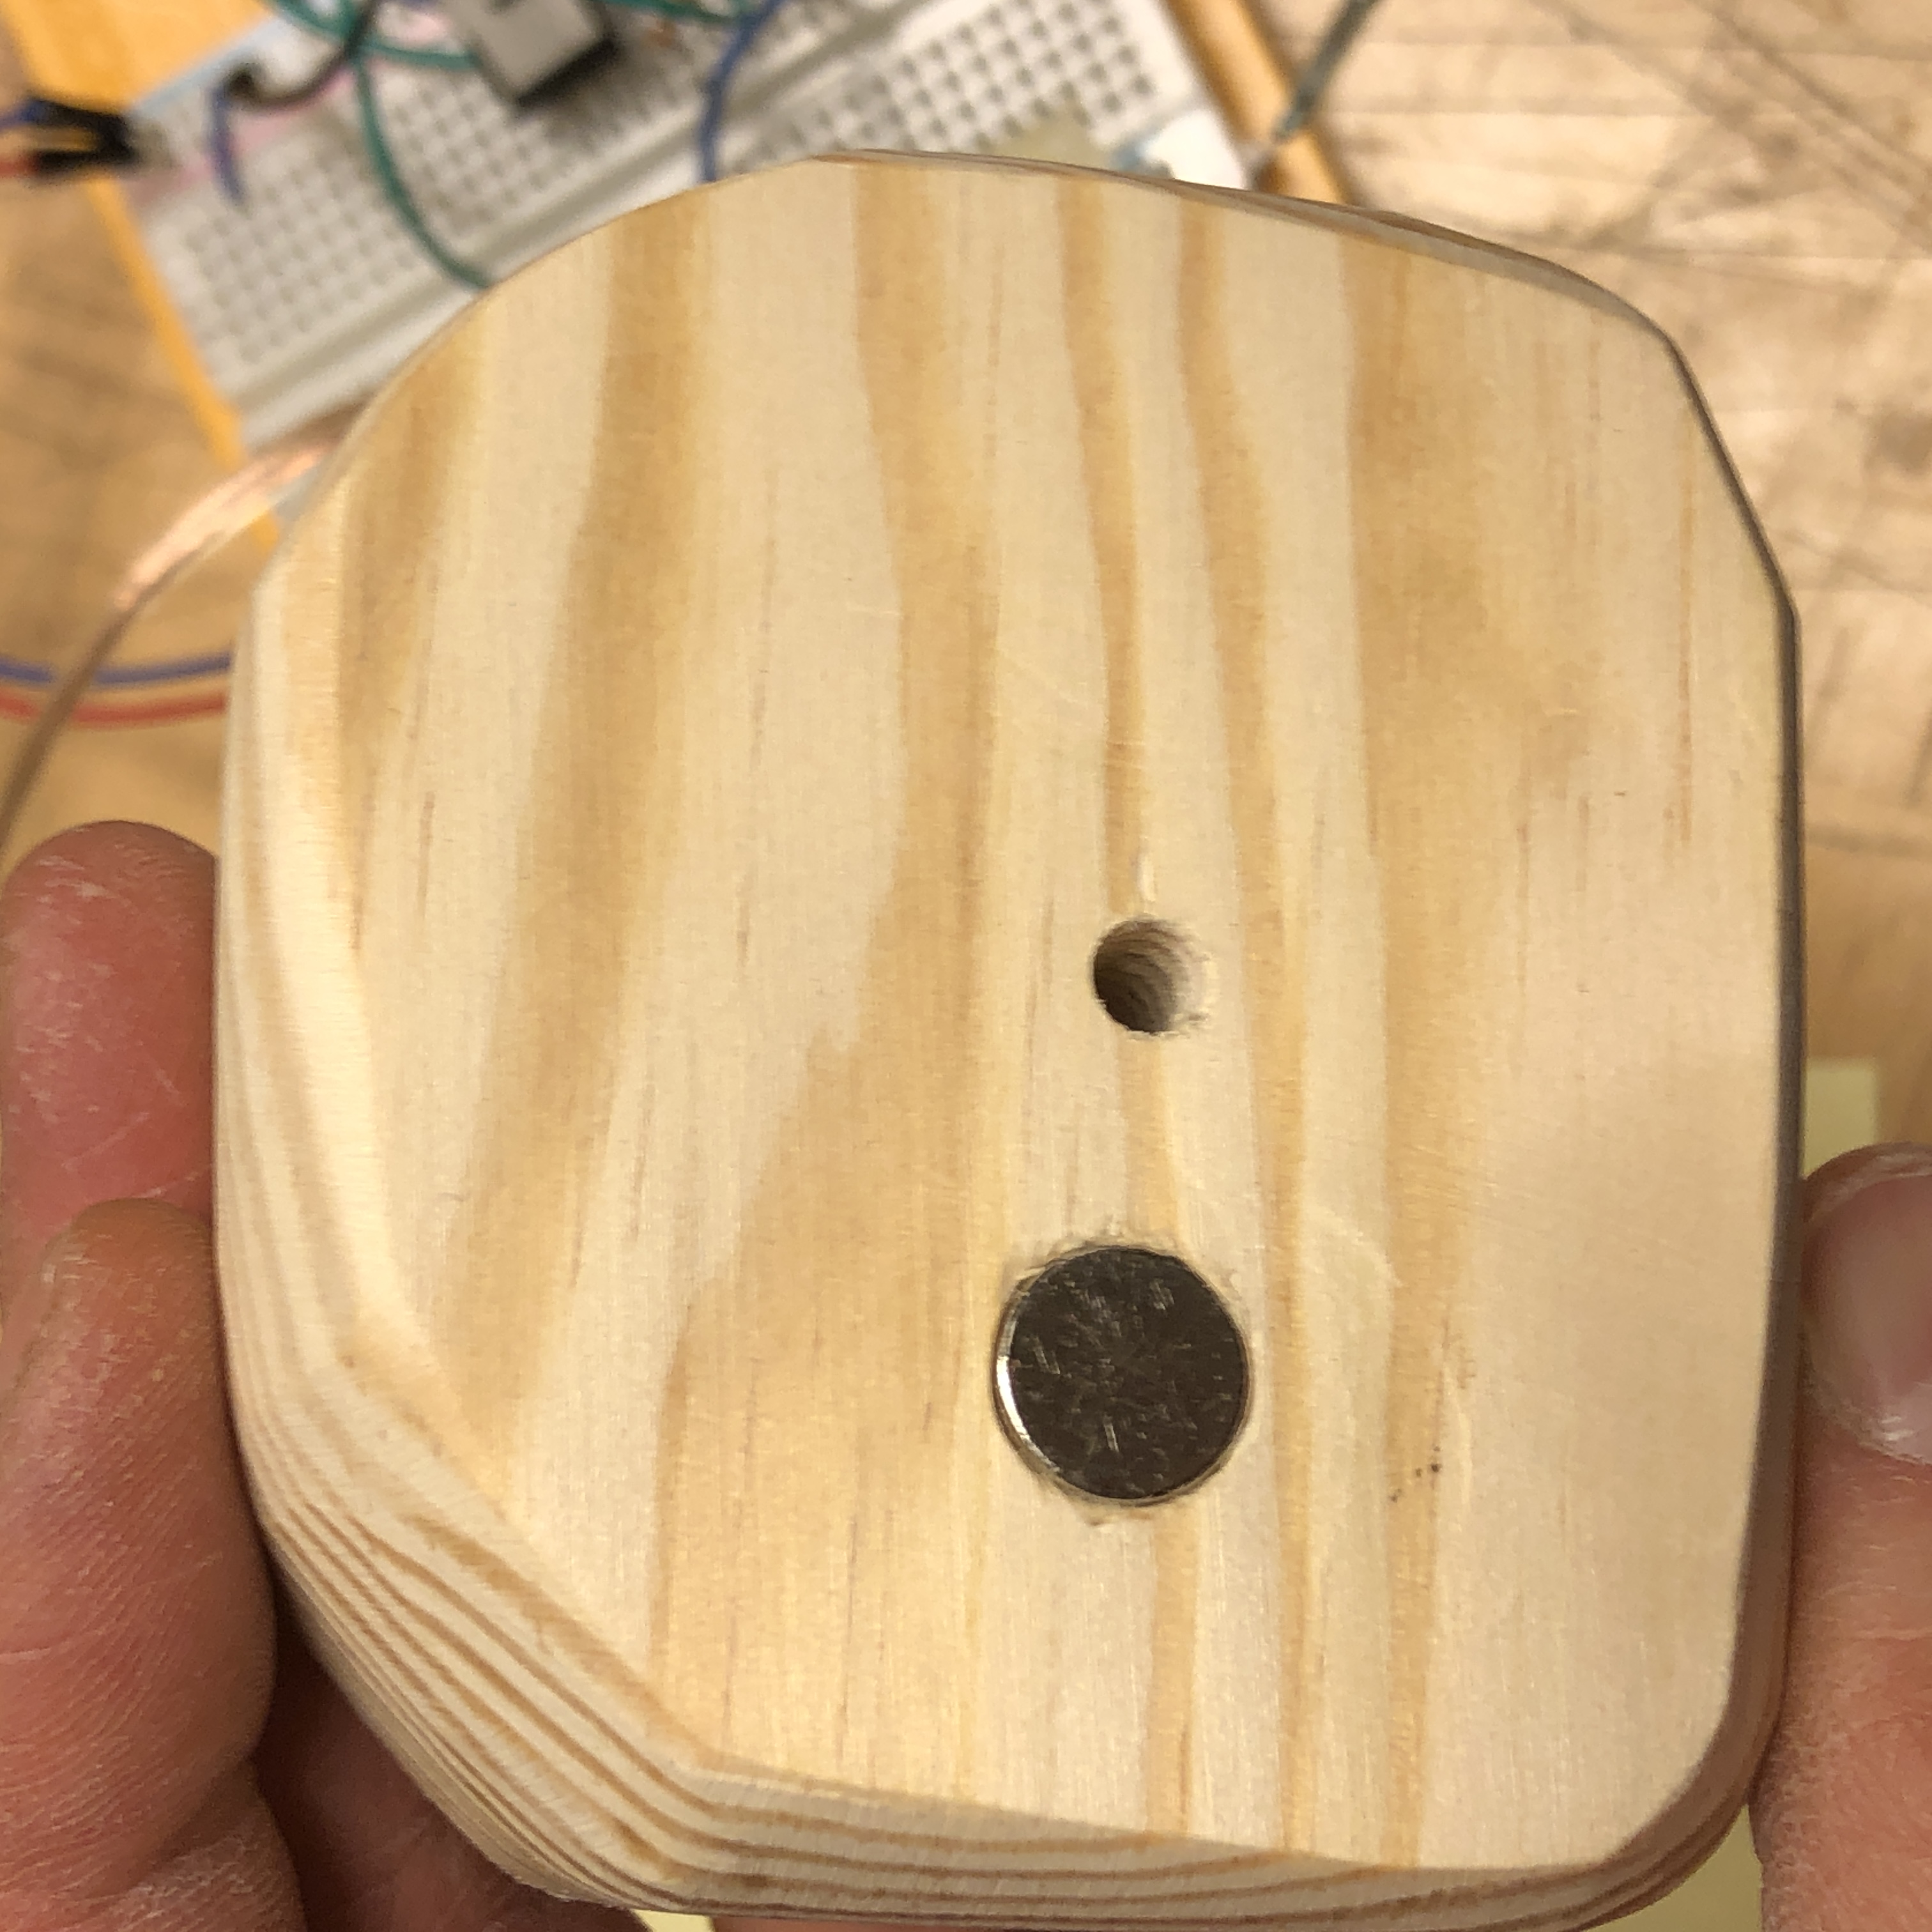
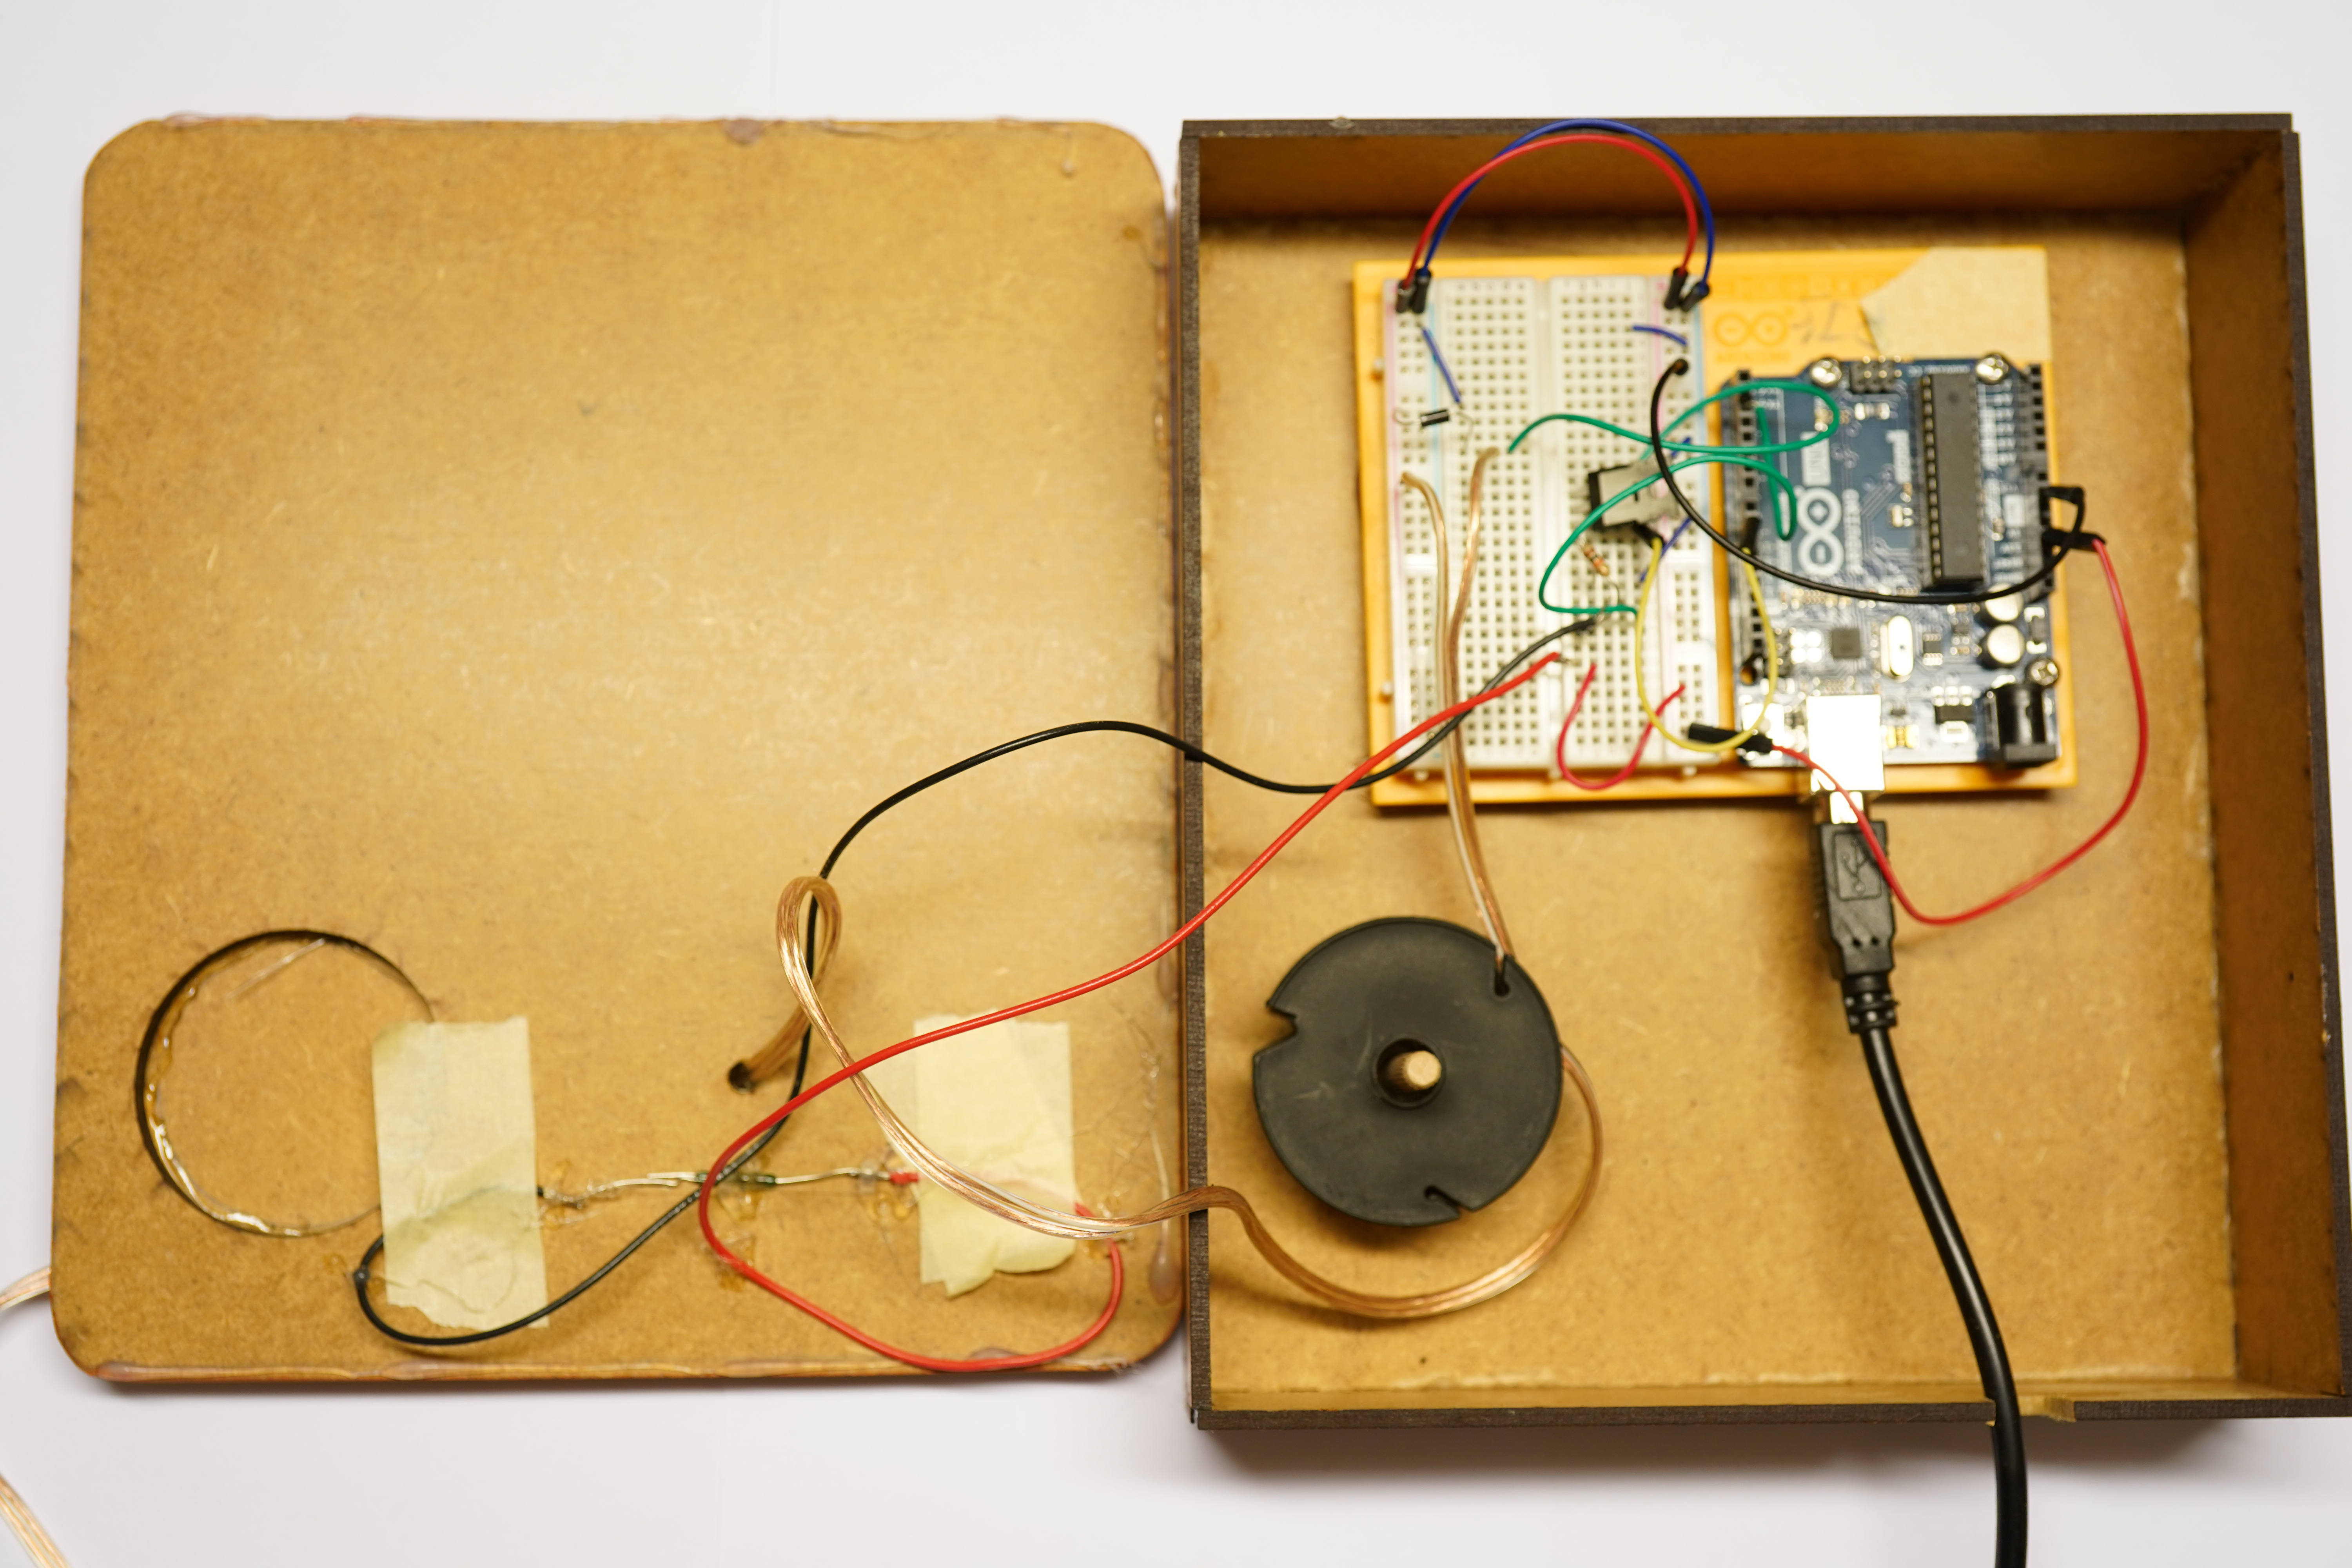
 The insides of the final prototype. Between the masking tape on the left, is a reed switch (which is activated by the magnet at the bottom of the “chestnut”).
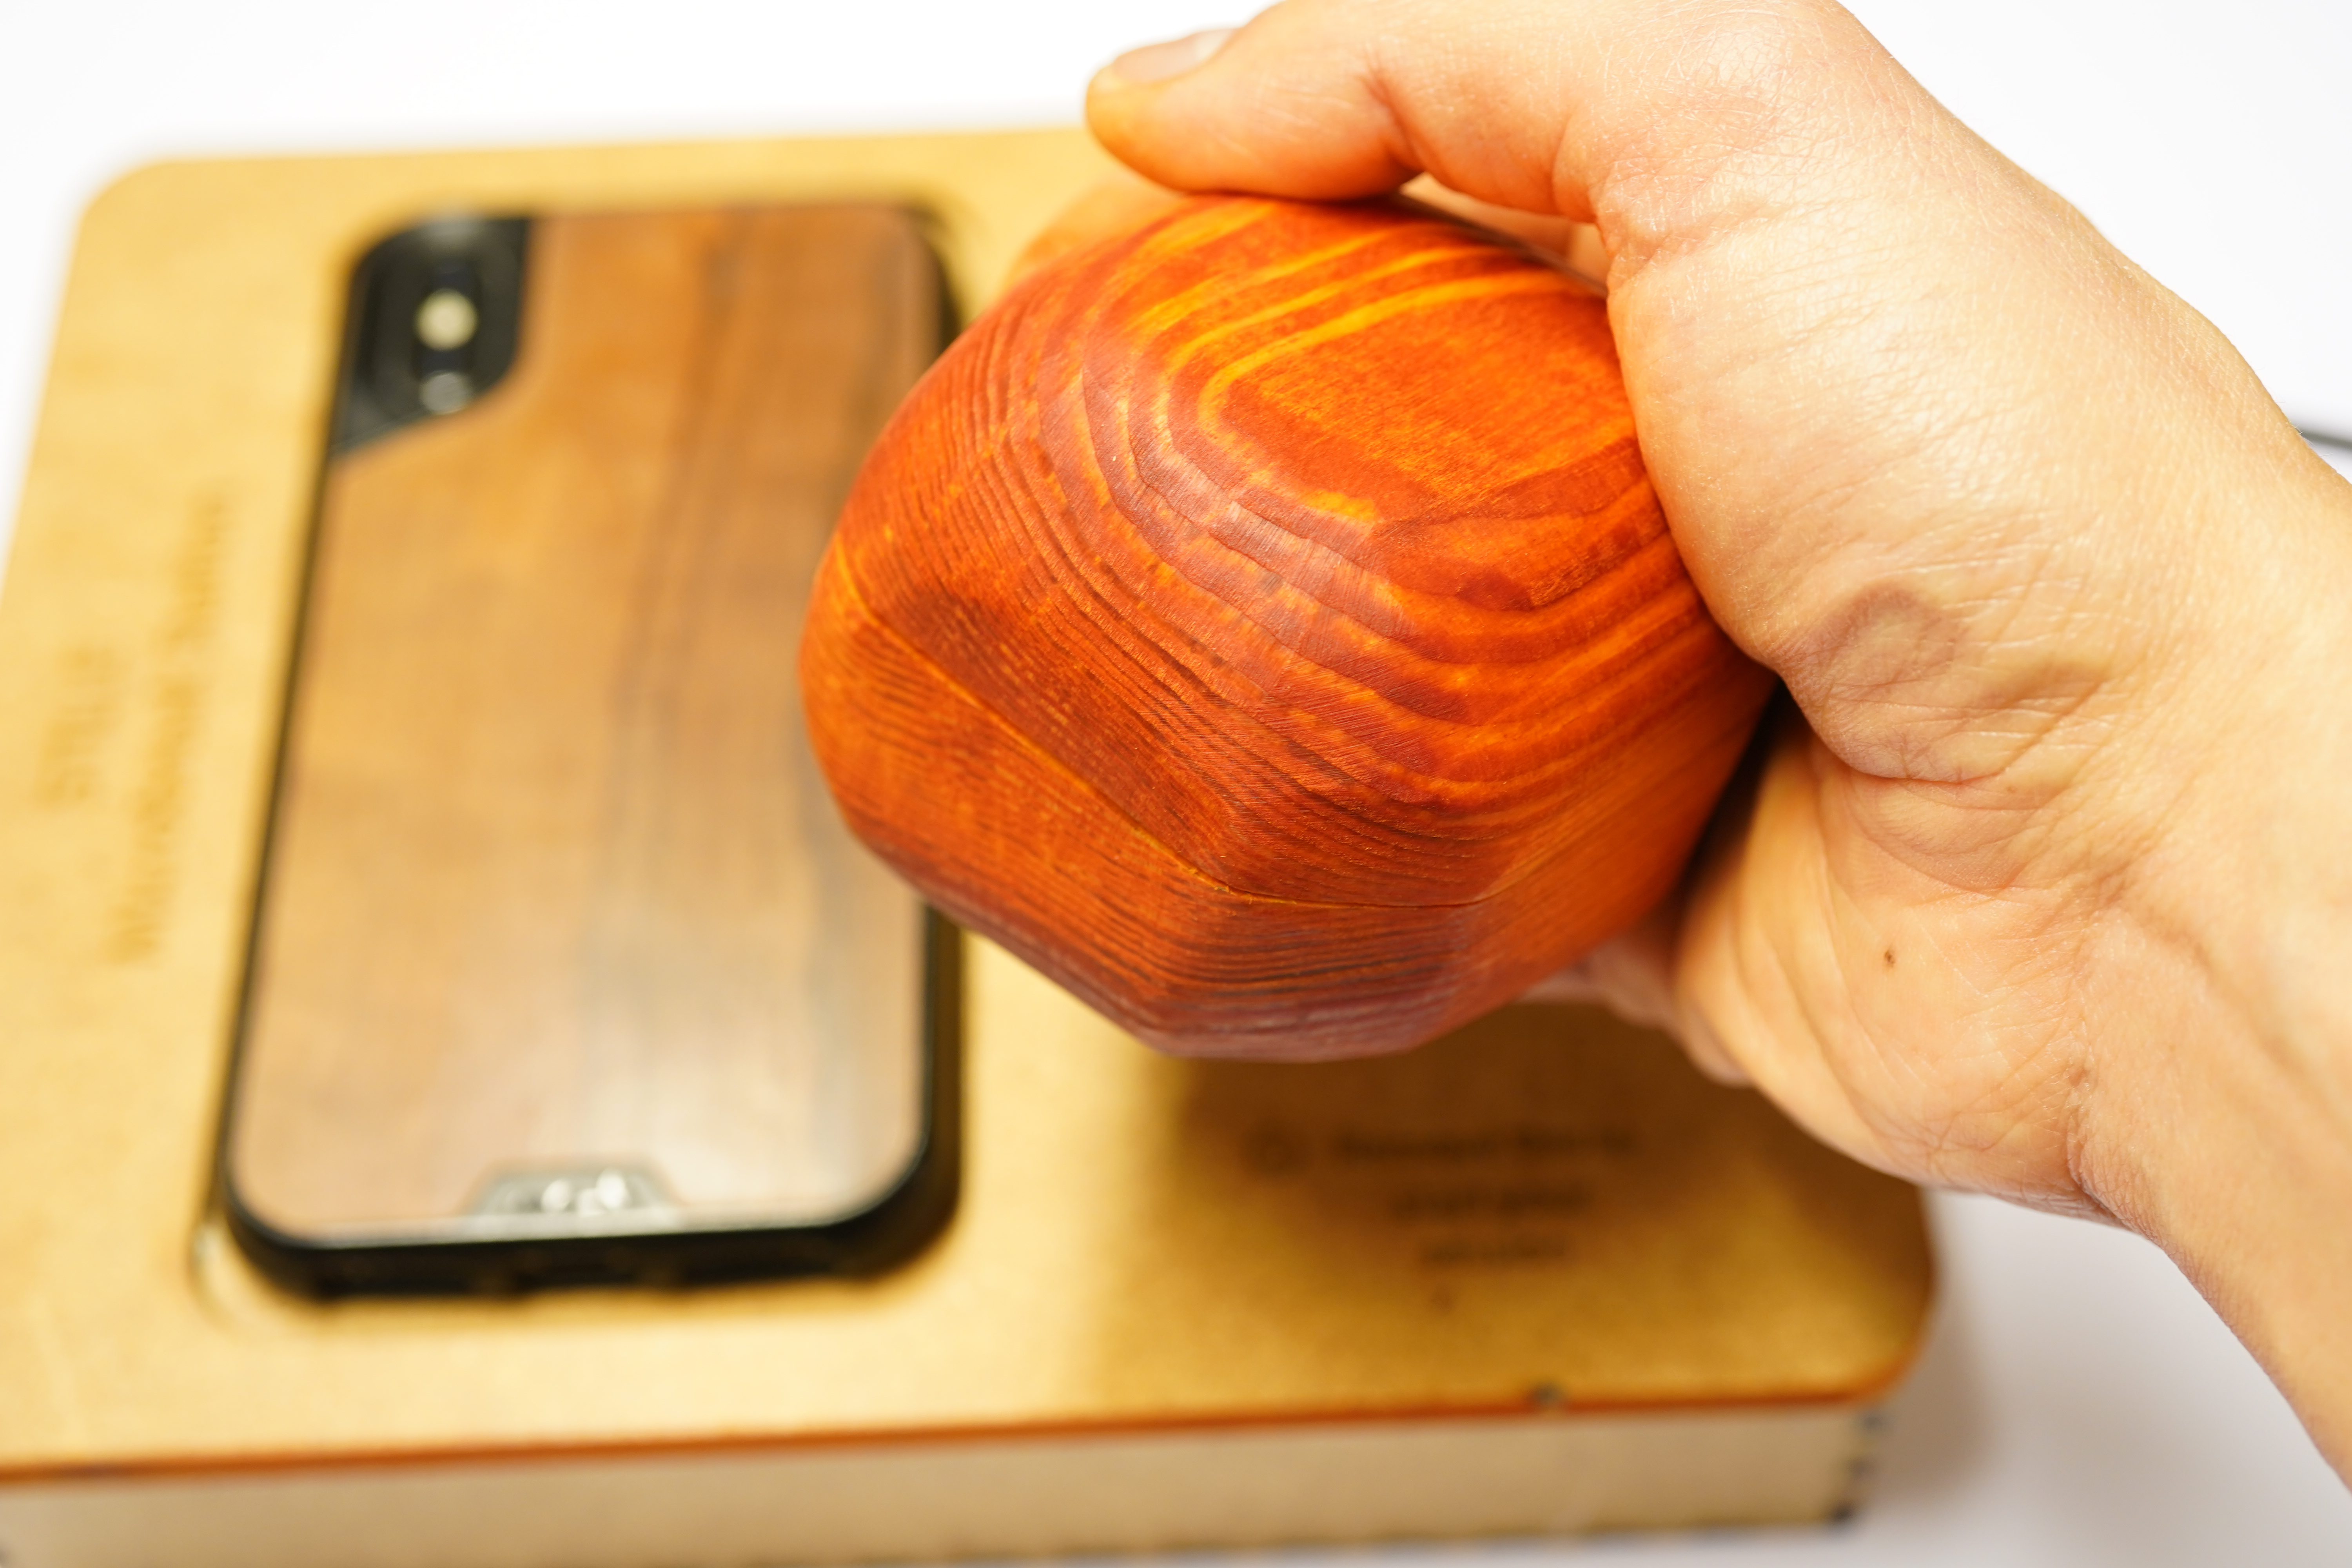
 Final prototype of the Microbreak station, with “chestnut” and phone in the backdrop.